Onlyview's plugin for UnrealEngine receives tracking data, actions and other inputs from Onlyview, and injects them in Unreal.
- For XR and AR setups, it receives camera data from network via UPD socket, and applies it to the desired camera. This includes the camera's position, rotation, zoom, and lens shift. Lens deformation is applied in Onlyview.
- More basic 3D tracking data can be streamed, allowing to track objects/rigidbodies.
- Simpler data can also be sent from Onlyview to Unreal, and used in Blueprints: number, events.
It is often used with Unreal's Spout plugin to output the final render to Onlyview, but it can also work without.
-
Copy OnlyViewPlugin folder and paste it into your Plugins folder (create a new once if it doesn't exist) in your C++ project.
-
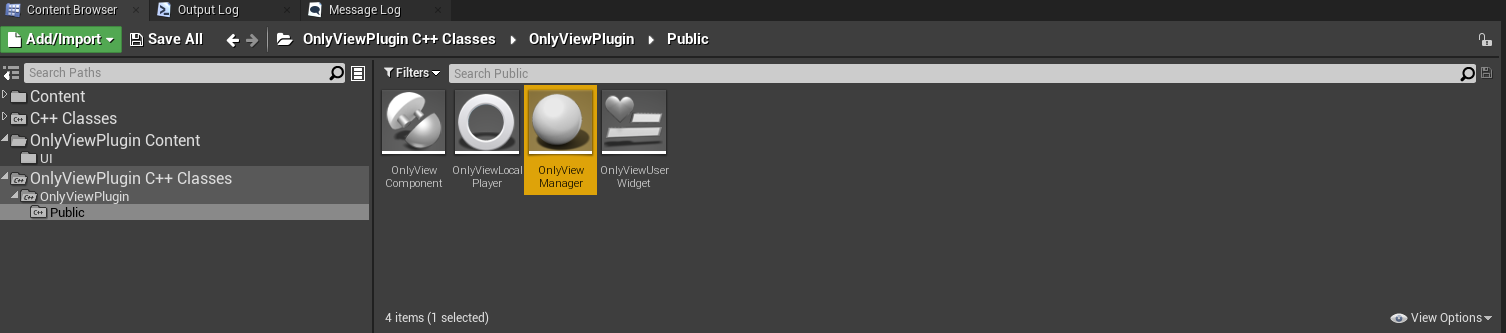
Open OnlyViewPlugin C++ Class/OnlyViewPlugin/Public in Content Browser and drag OnlyViewManager actor class into your level:
In a blueprint, add a reference to OnlyviewComponent, and bind an event to "On Received Float Data" :
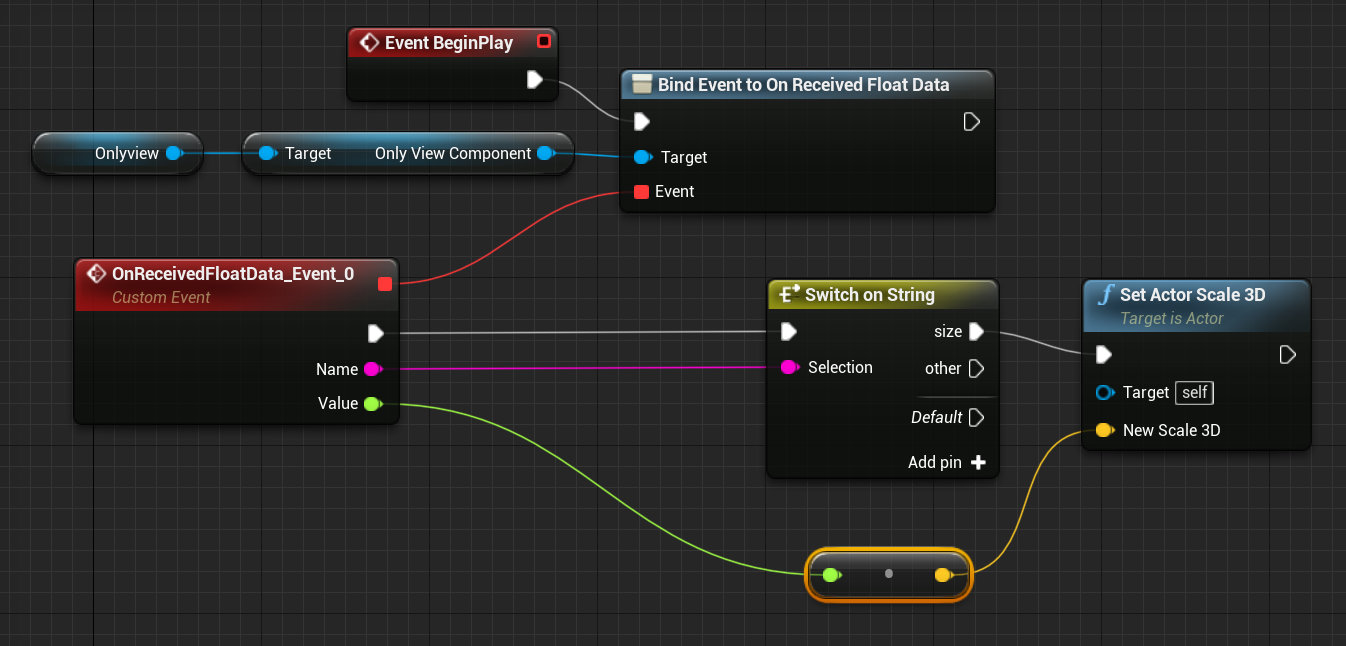
In this example, the handler checks if the parameter name is "size", and if so, sets the scale of the Actor accordingly.
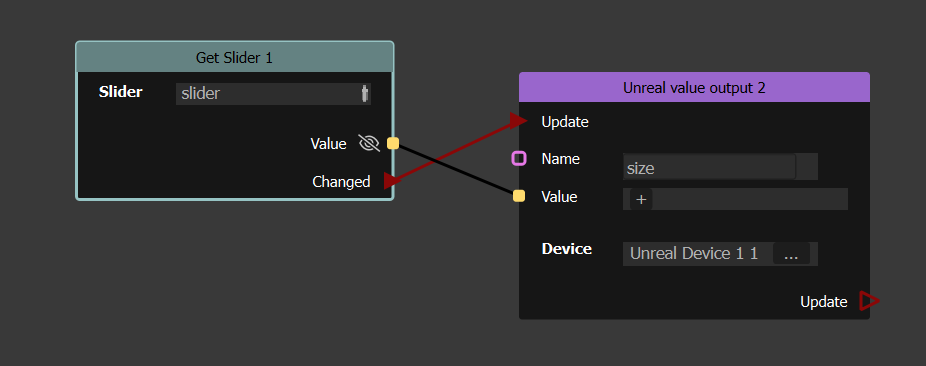
On Onlyview's side, add a Devices/Unreal Engine/Unreal value output node, and connect it to whatever you want : a sine wave, a QuickKey... in this example, it is linked to a slider in the webpanel :
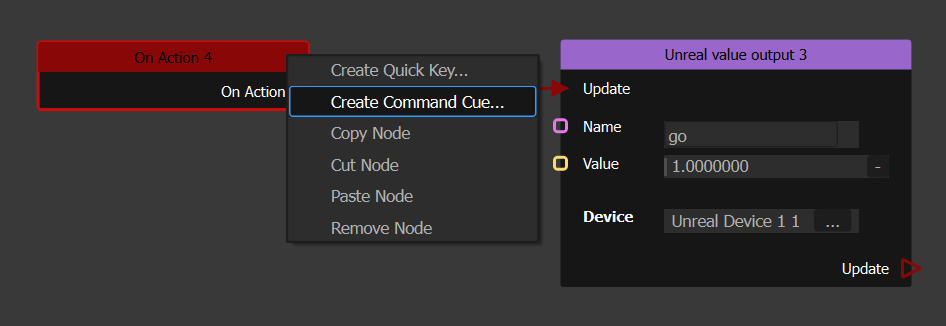
In this example, a "go" command is linked to an action, which can be triggered by a CommandCue :
After installing the plugin, open Project Settings, in General Settings select Local Player Class and choose OnlyViewLocalPlayer class, then restart the editor:
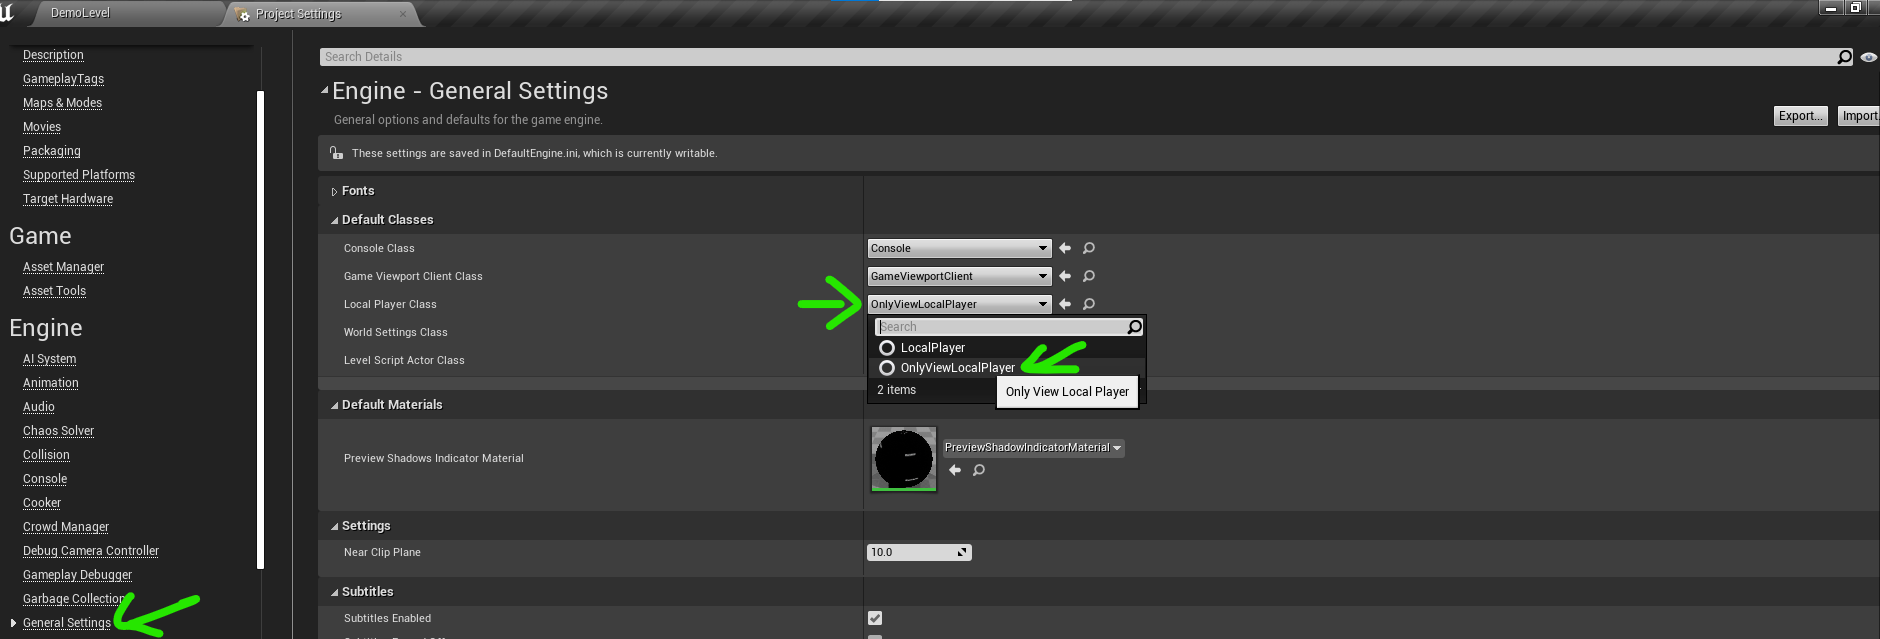
⚠️ You must restart the editor after set Local Player Class, otherwise Lenshift feature will not work until the editor is restarted.
- Select the OnlyViewManager in your level, then in Only View Component Category, add scene captures 2D in your level to Tracking Captures array, and any Actor that you want to track to Tracking Objects array, and config socket Port, Description, Buffer Size. I recommend enabling Auto Start Listening:
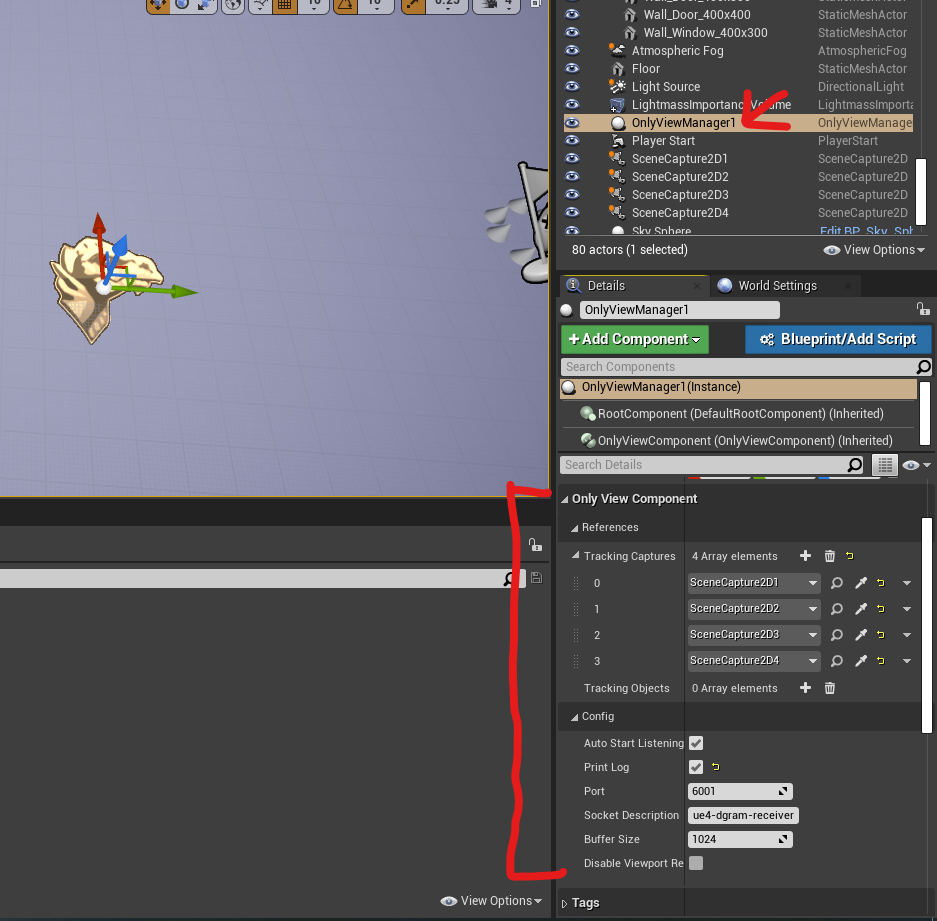
That's all you need to do, the plugin will automatically stop listening socket when you end play.
All OnlyViewPlugin function are in the OnlyView Component. You can add OnlyView Component to any actor blueprint instead of using the built-in OnlyViewManager script
⚠️ Note that OnlyViewManager actor already has a OnlyViewComponent.
- In your blueprint, select Add Component and choose OnlyView Component:
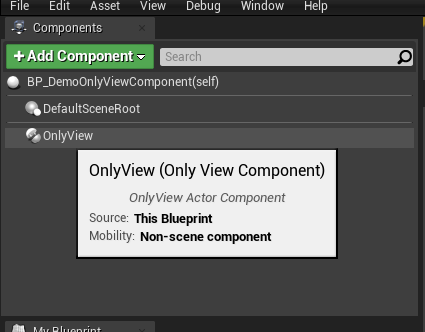
- Then you can use OnlyView component to start/stop listening socket, applying data to camera and get the camera information, or structure, etc.. Here are all OnlyView Component blueprint functions:
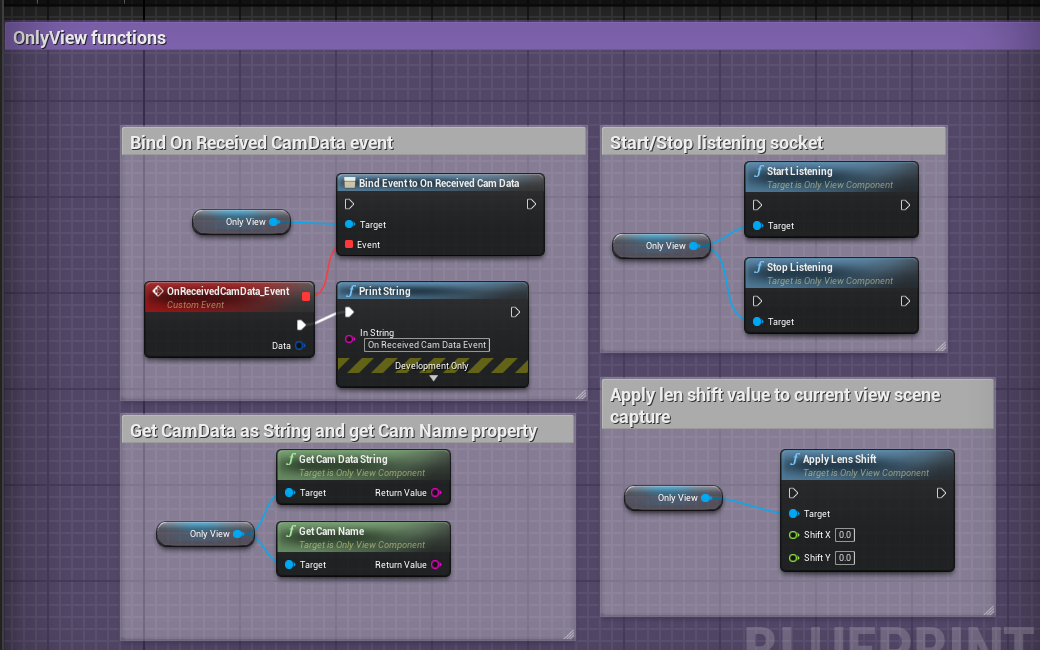
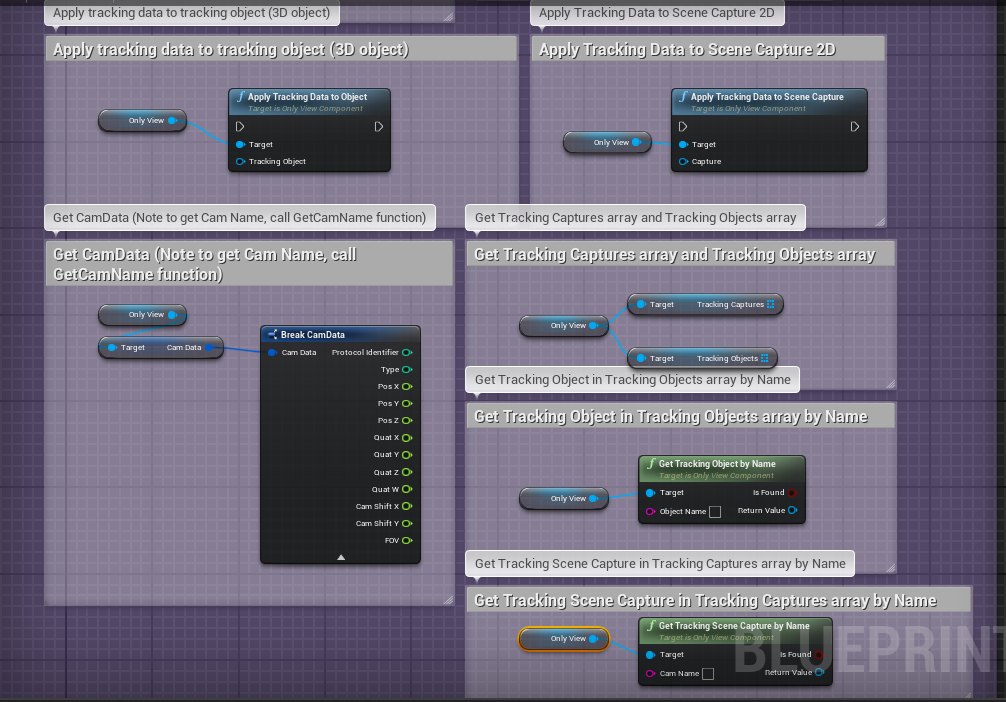
See BP_DemoOnlyViewComponent for more examples of OnlyViewComponent usage
⚠️ OnlyViewUserWidget is removed in new version, please stop using it
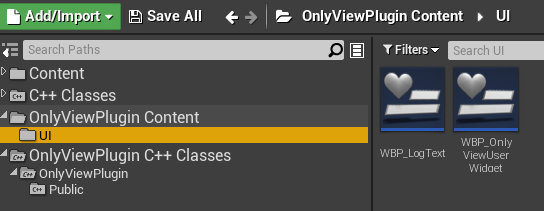
- Note that WBP_OnlyViewUserWidget locates at the plugin Content folder:
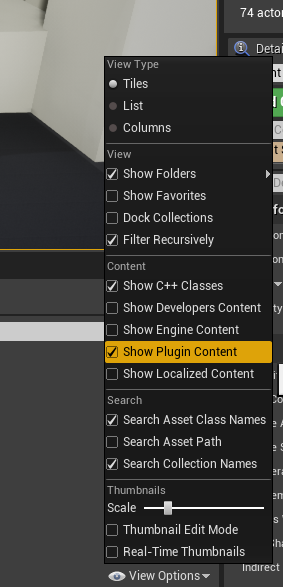
- If you don't see the plugin's Content folder, you need to enable it in View Options, just enable Show Plugin Content option:
-
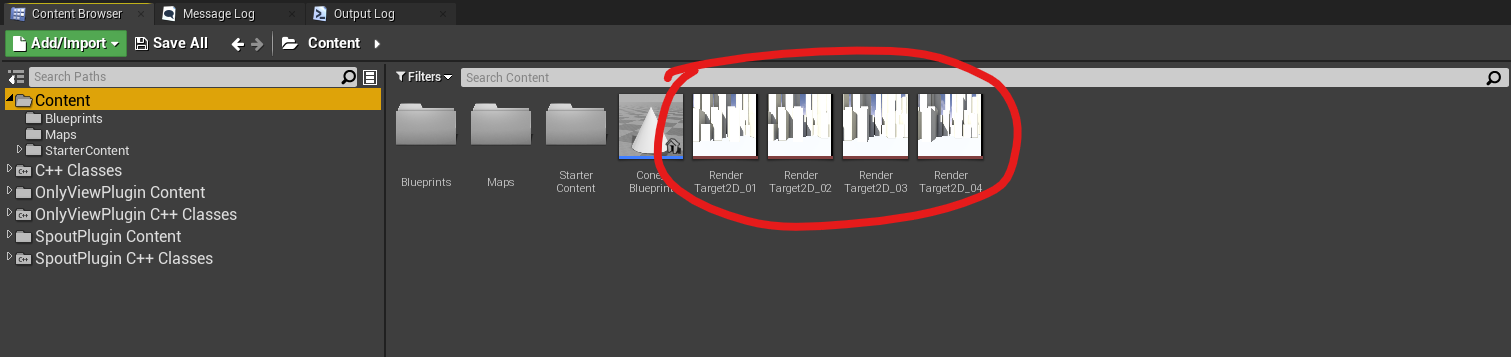
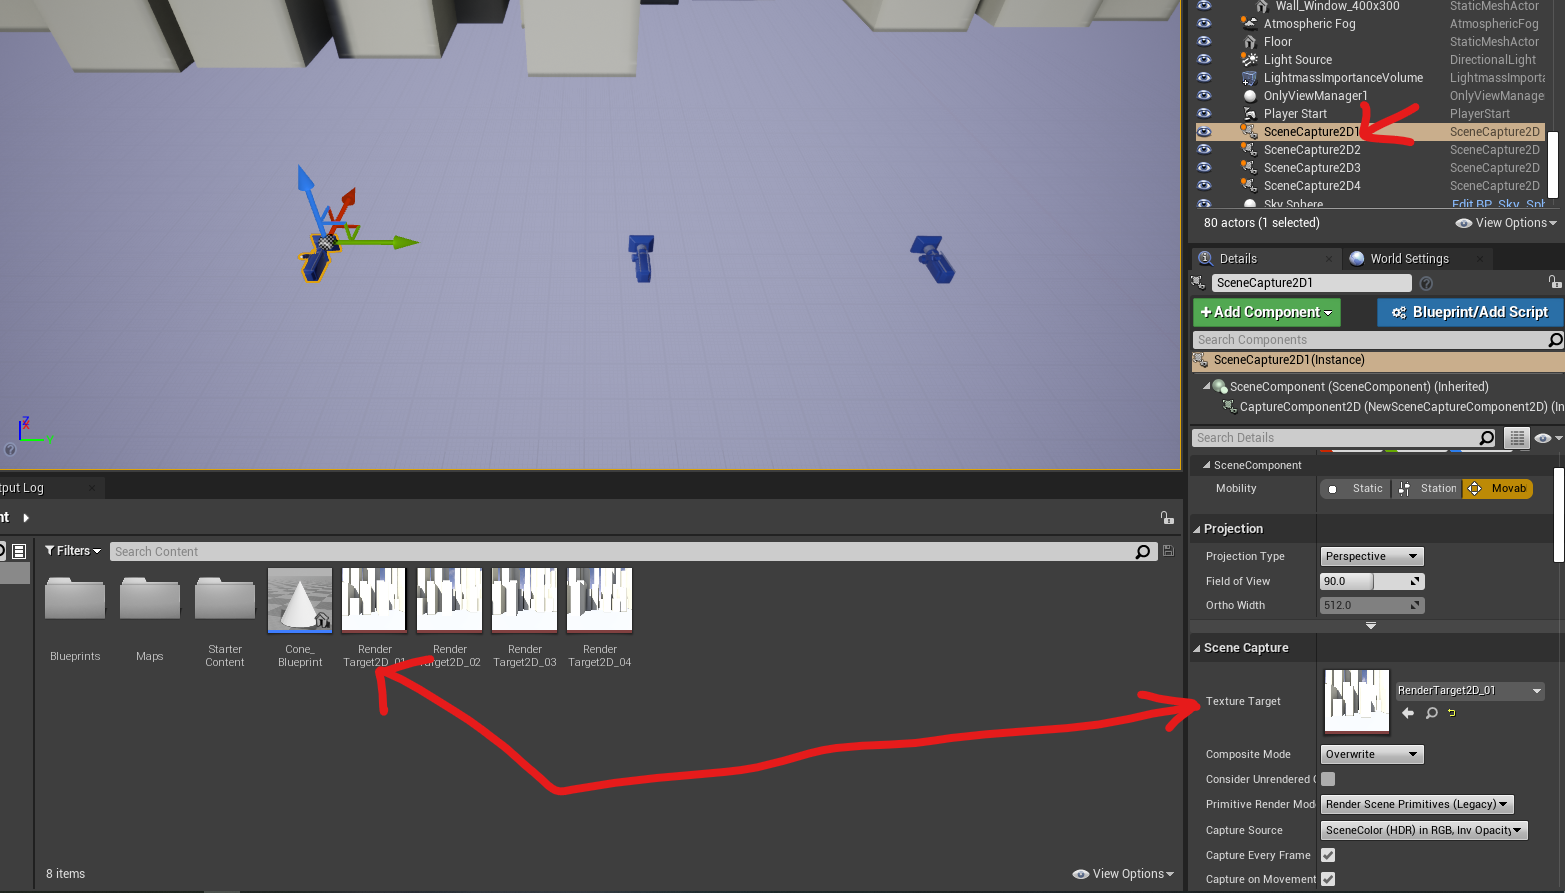
To support multi Spout camera, first you have to create a Render Target texture for each Scene Capture 2D in your Level. Here I created 4 RenderTarget Texture for 4 Scene Captures in DemoLevel:
-
Then assign the RenderTarget texture to proper SceneCapture2D actor:
-
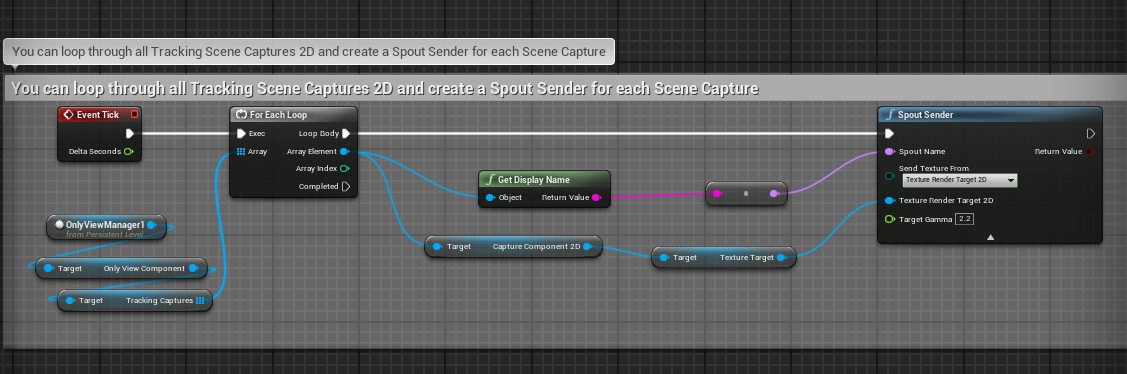
Then you can create Spout Sender for each RenderTarget texture you have, or, simply loops through the TrackingCaptures array and get the TextureTarget to create Spout Render:
-
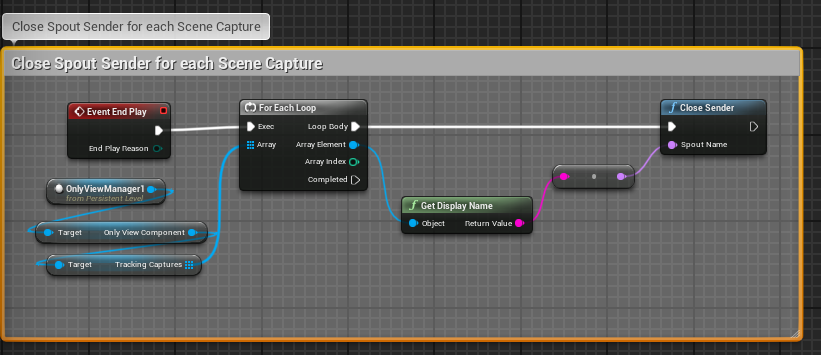
Loops through TrackingCaptures to close Spout Sender:
-
Open DemoLevel Level Blueprint to see example of multi Spout Sender