This file covers the setup of how to run the experiments for lossless-adjustable transformer.
git pull - pulls the latest from repository
git add 'filename' - adds file with a name 'filename' to commit
git commit -m 'commit message' - performs a commit with 'commit message' message
git push - pushes commits to git
git stash - stashes (removes) all the local changes (can be used if there is error in pulling/commiting)
- Download gitHub desktop from https://desktop.github.com/
- Clone this repository to your local computer
-
Turn on Raspberry Pi
-
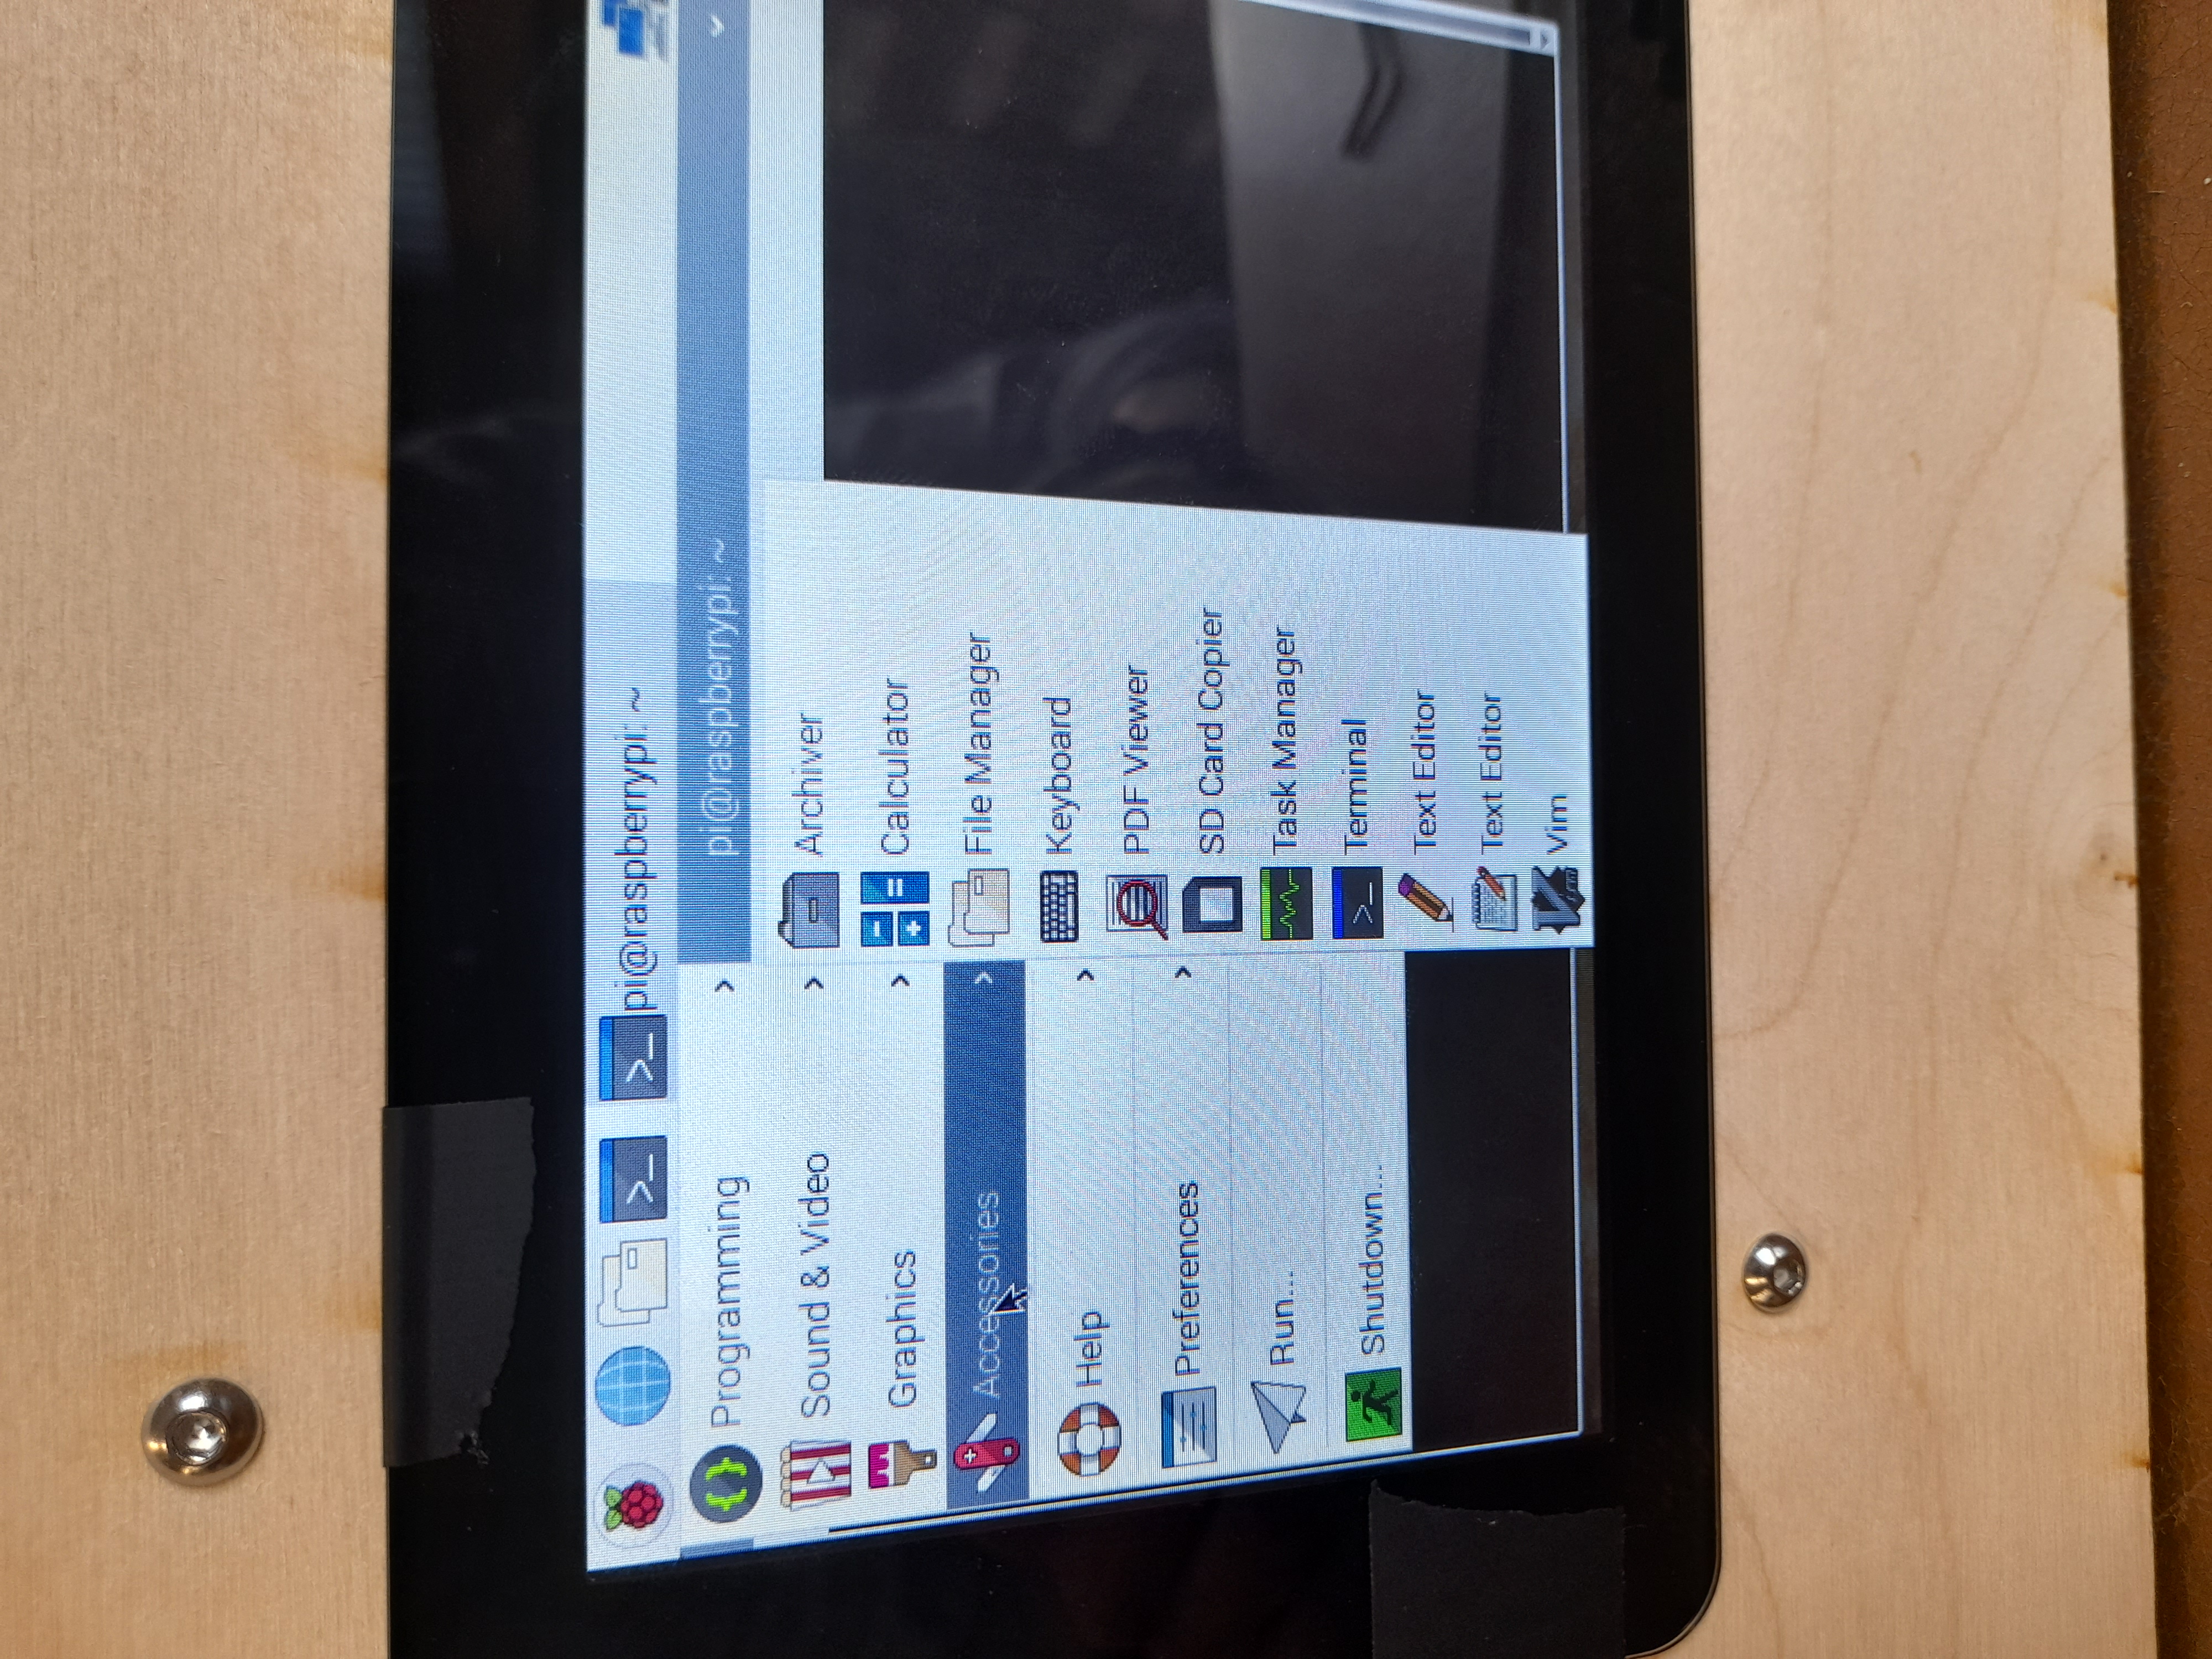
Bring up Top Left -> Accessories -> Keyboard
-
Open Terminal clicking the terminal icon at the top
-
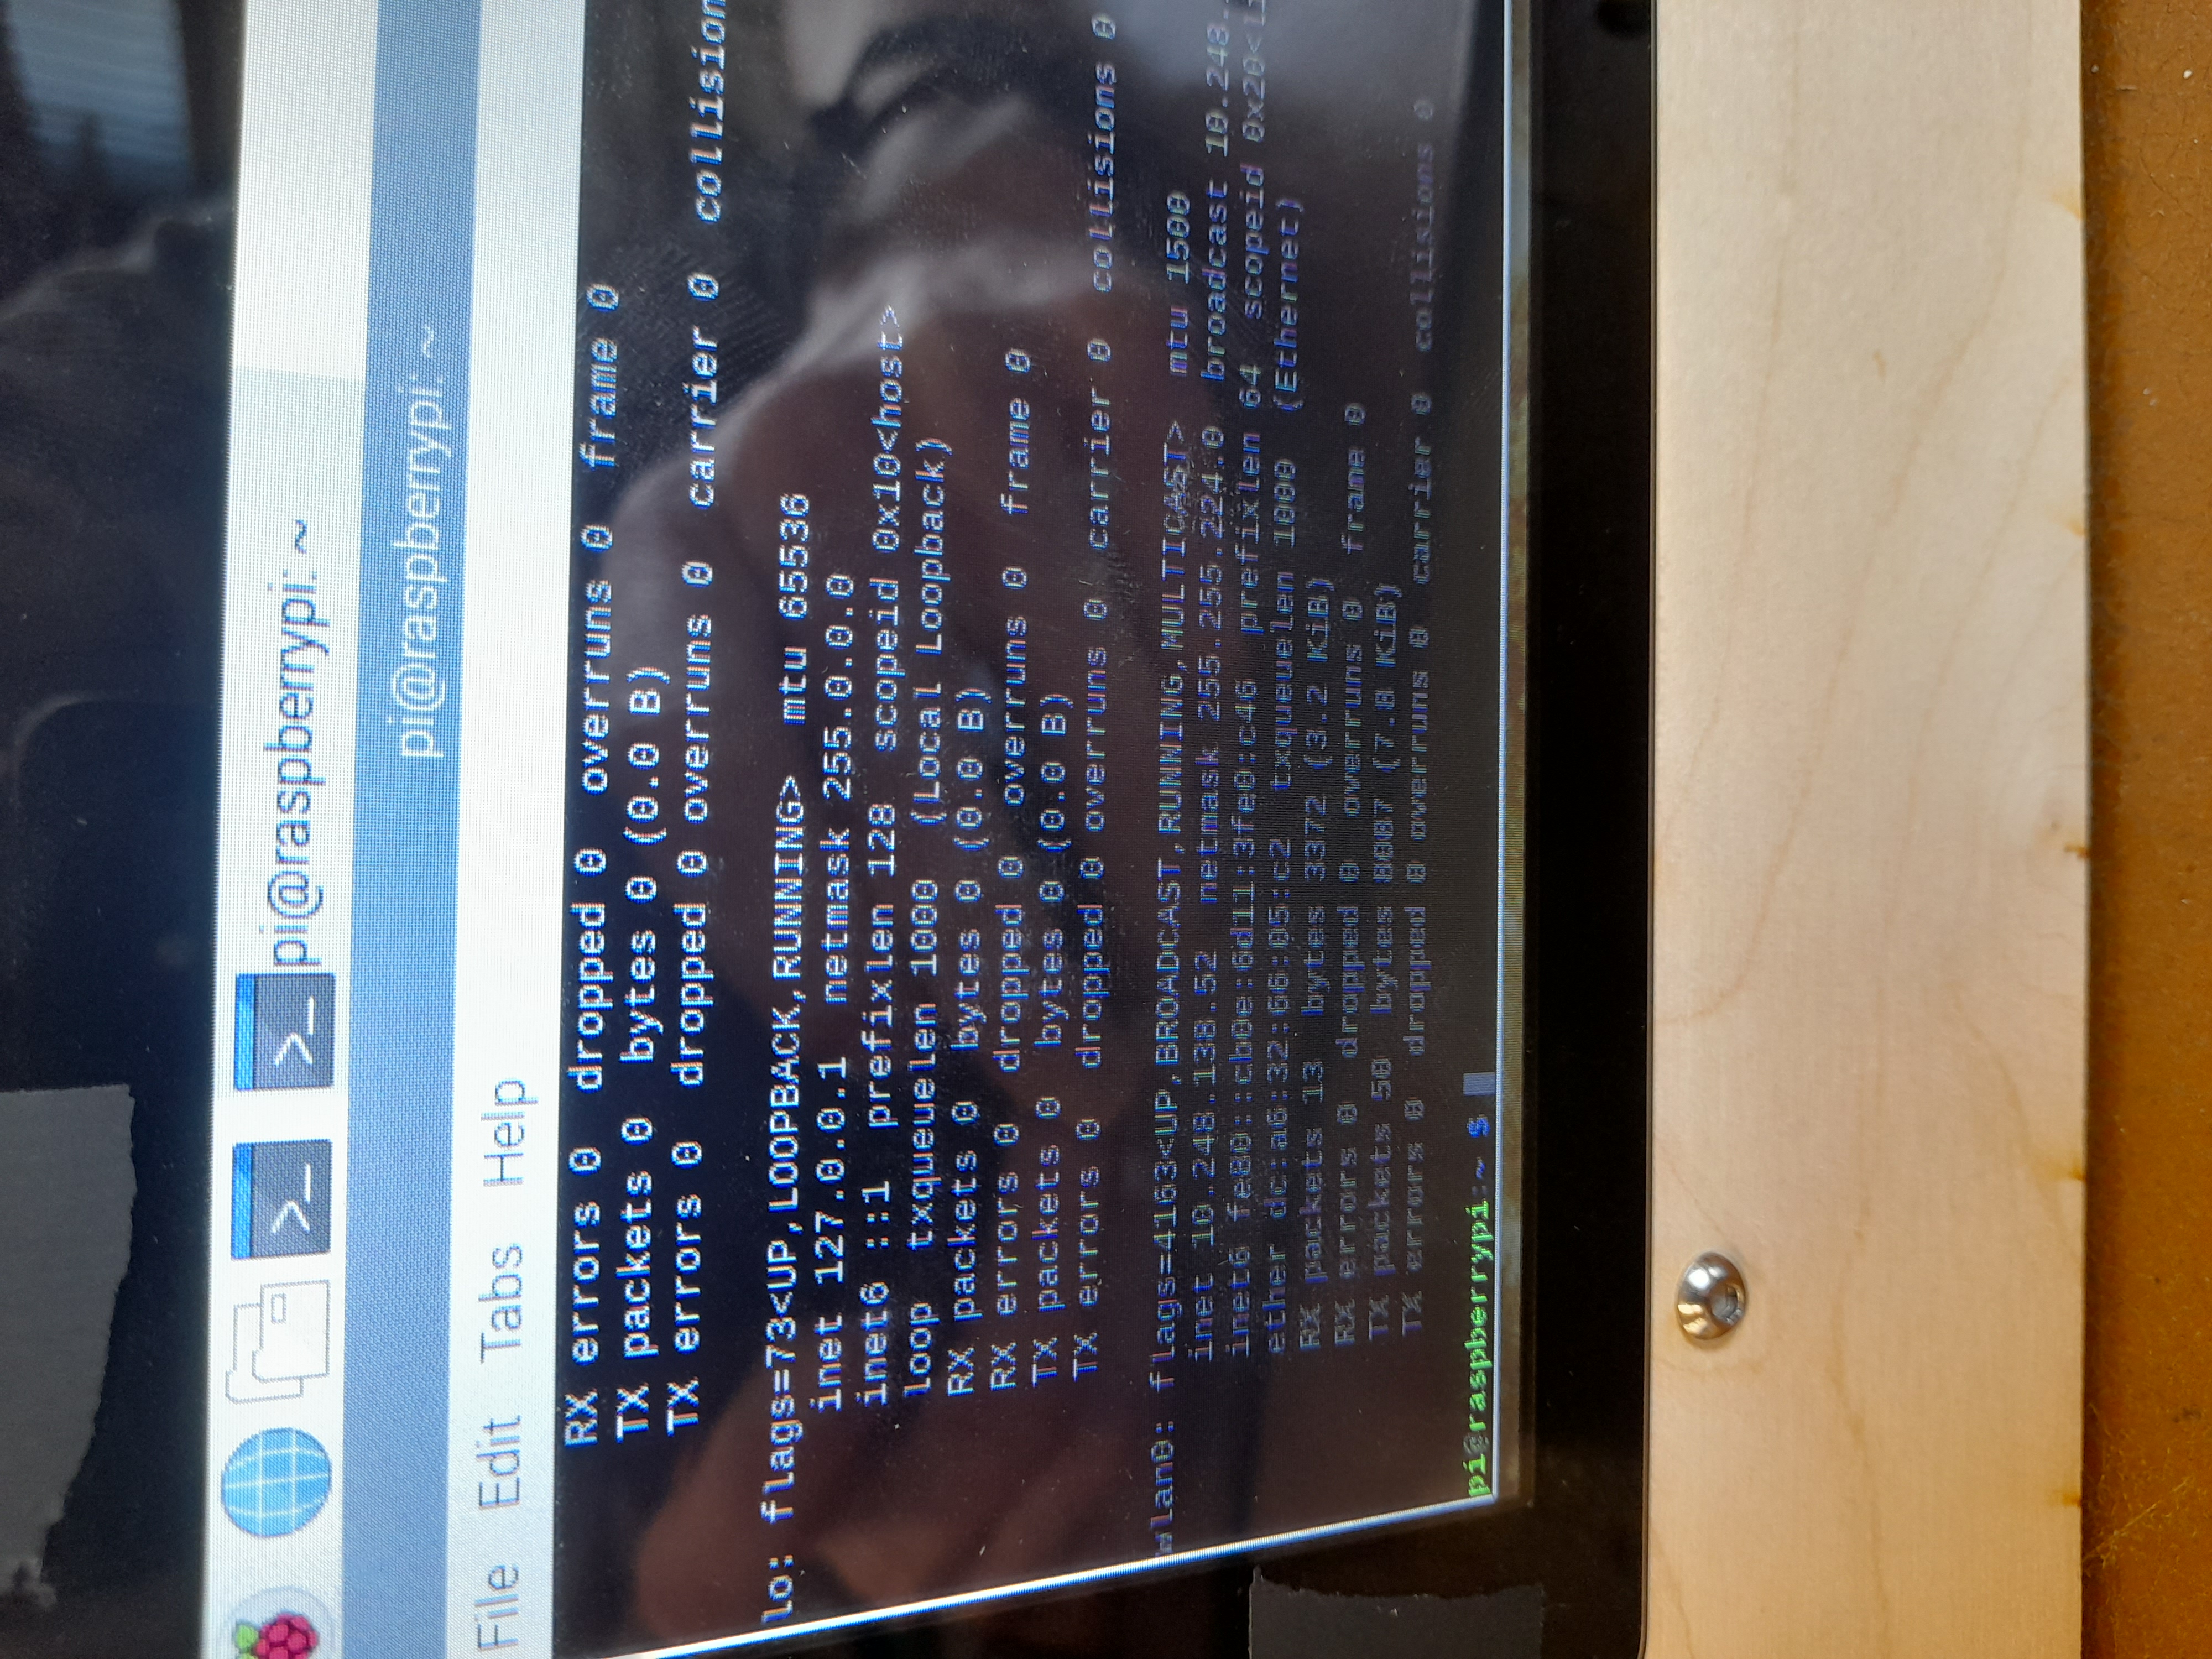
Using the pop up keyboard type "ifconfig" in terminal

-
The following message will be displayed. Find the line that says wlan0. Write down the numbers next to "inet" (starts with 10.248...)
-
On a Mac open terminal (Command + Space, then type "terminal")
-
In terminal type: ssh pi@IP-Address where IP-Address is replaced by the number 10.248....
-
You will then be prompted for a password. Type "pass" and press Enter. You should now be connected to Raspberry Pi.
To navigate to the correct folder type
- cd git
- cd LAT-Exp
-
Download DSCUSB Toolkit from here on your laptop https://www.mantracourt.com/software/dscusb/dsc-usb-toolkit
-
Connect the USB from the loadcell to your laptop
-
Run the DSCUSB Toolkit program, the loadcell should then appear
-
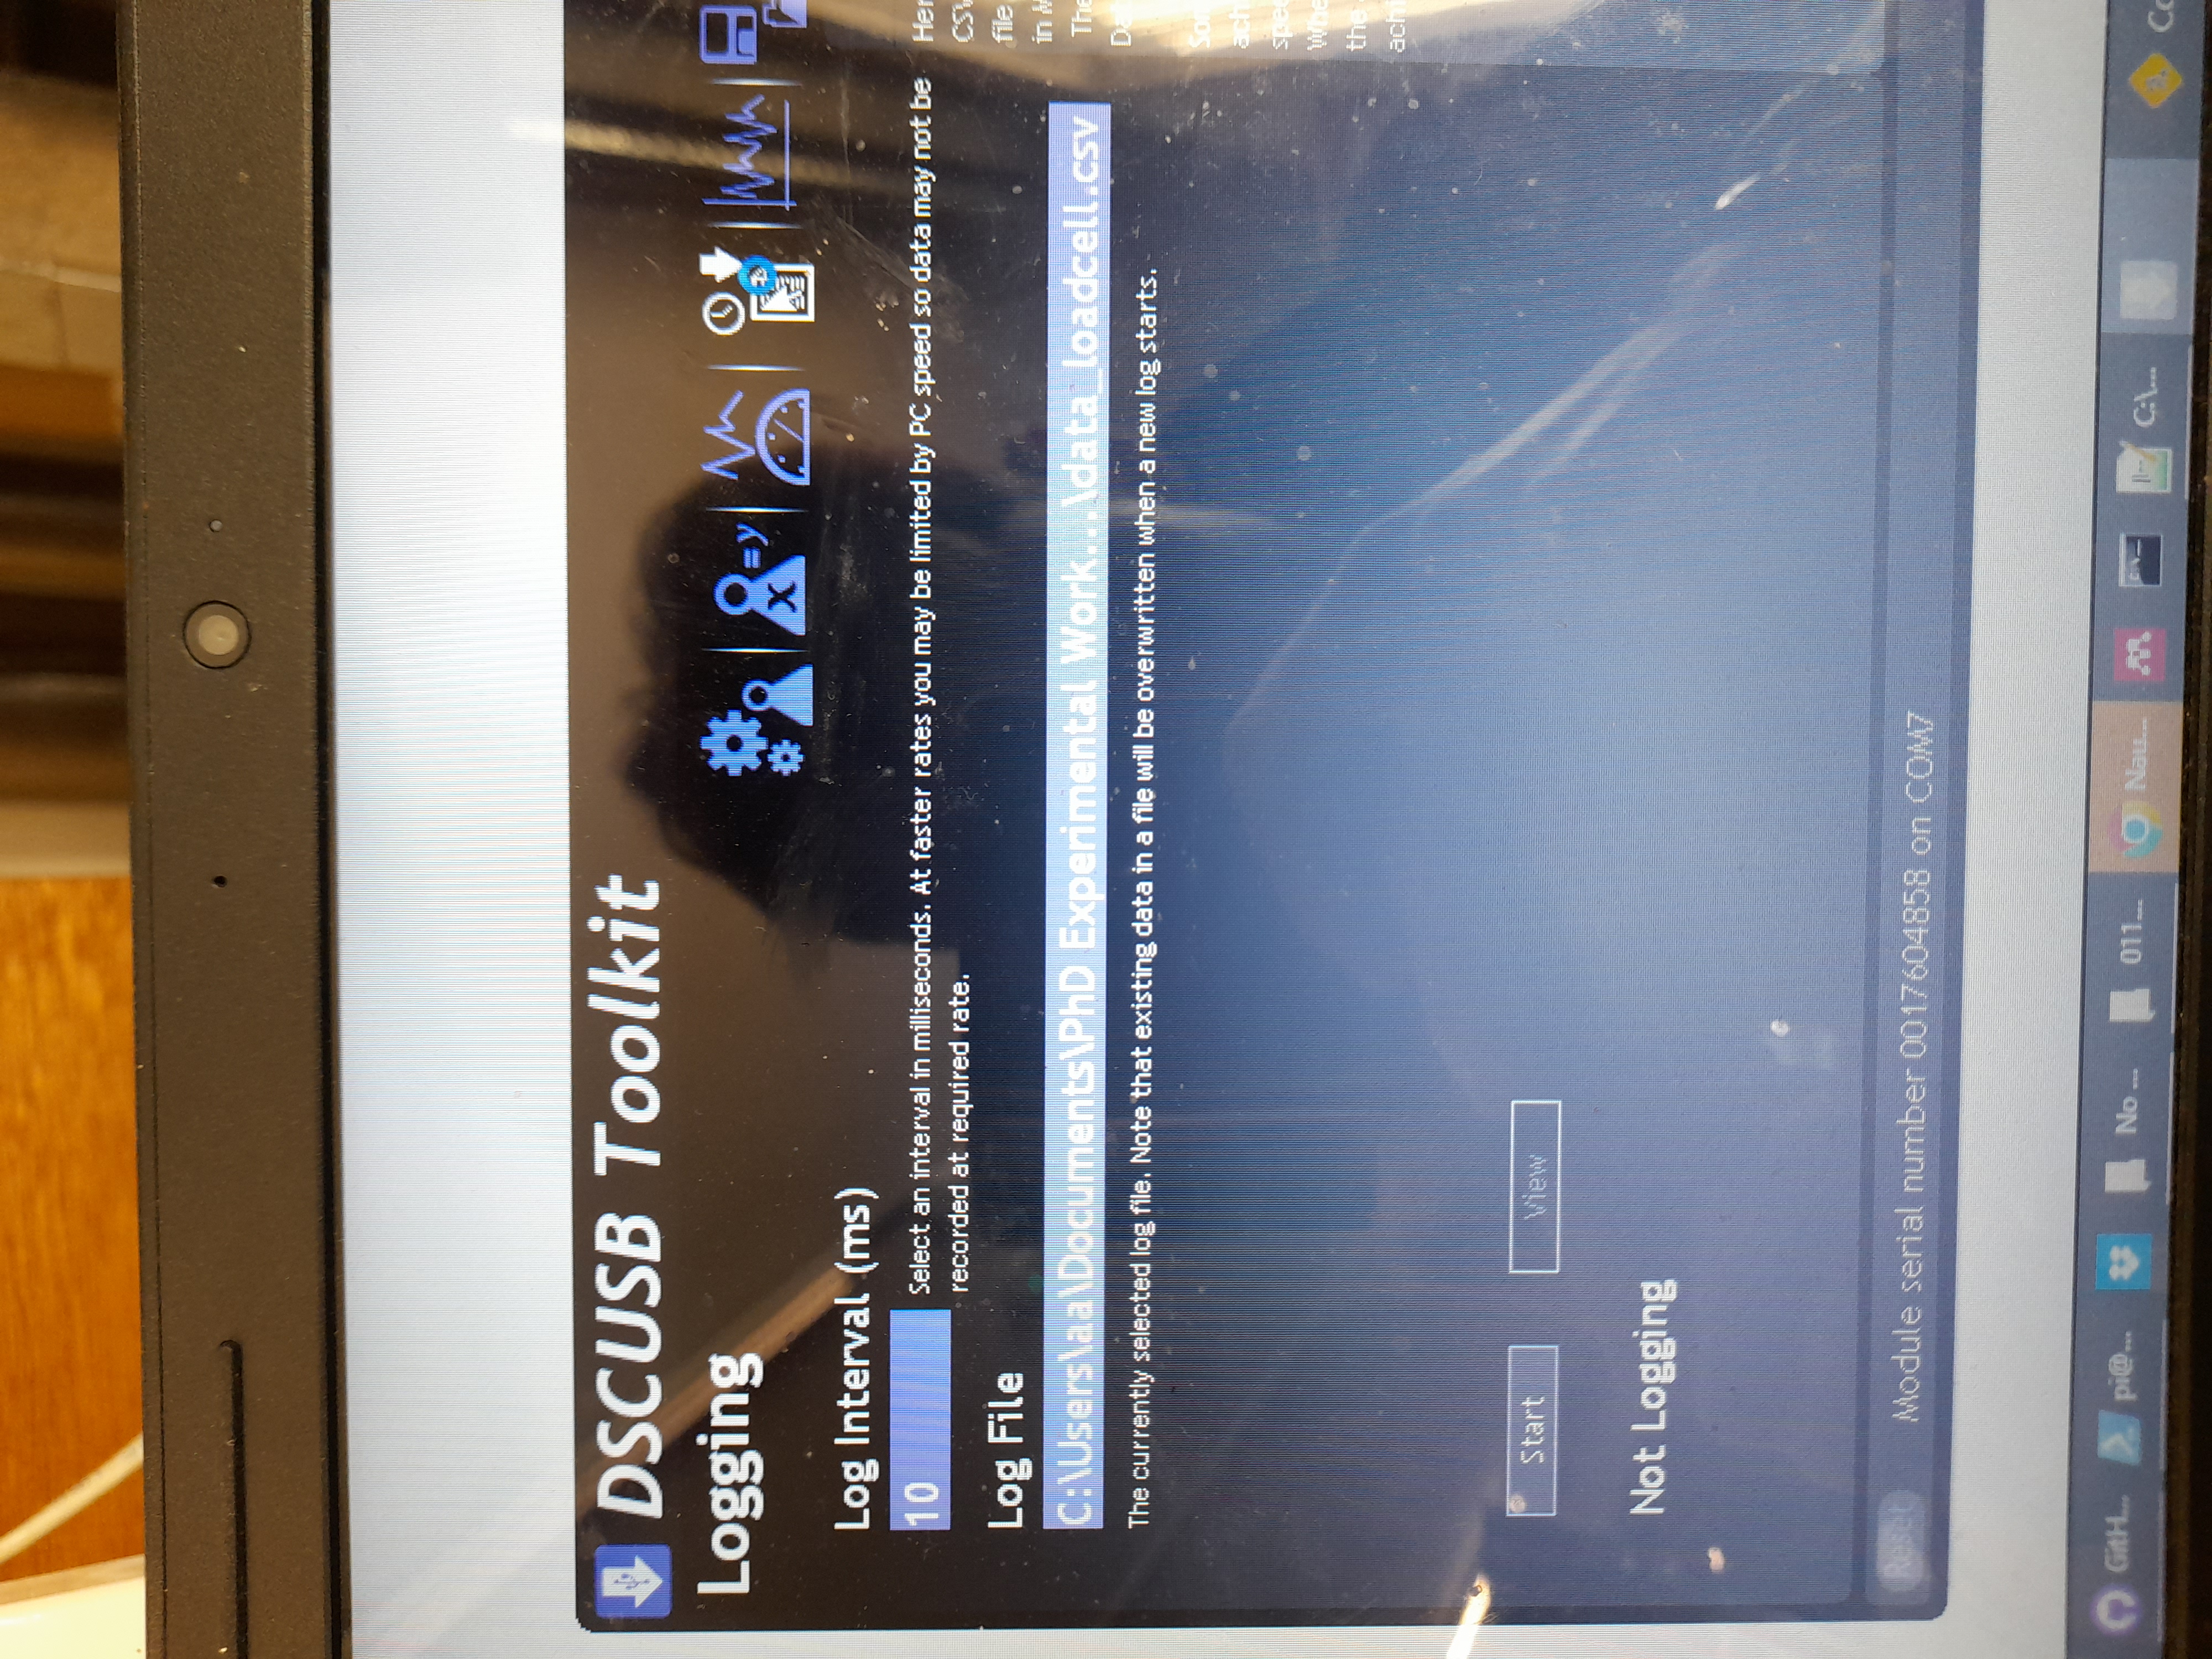
To start recording data go to 'Logging' type
-
Select the folder where you want to record the data (I would recommend that the folder is in the same git repository so that it is synced to git)
-
Name the file being recorded as 'data_loadcell.csv'
-
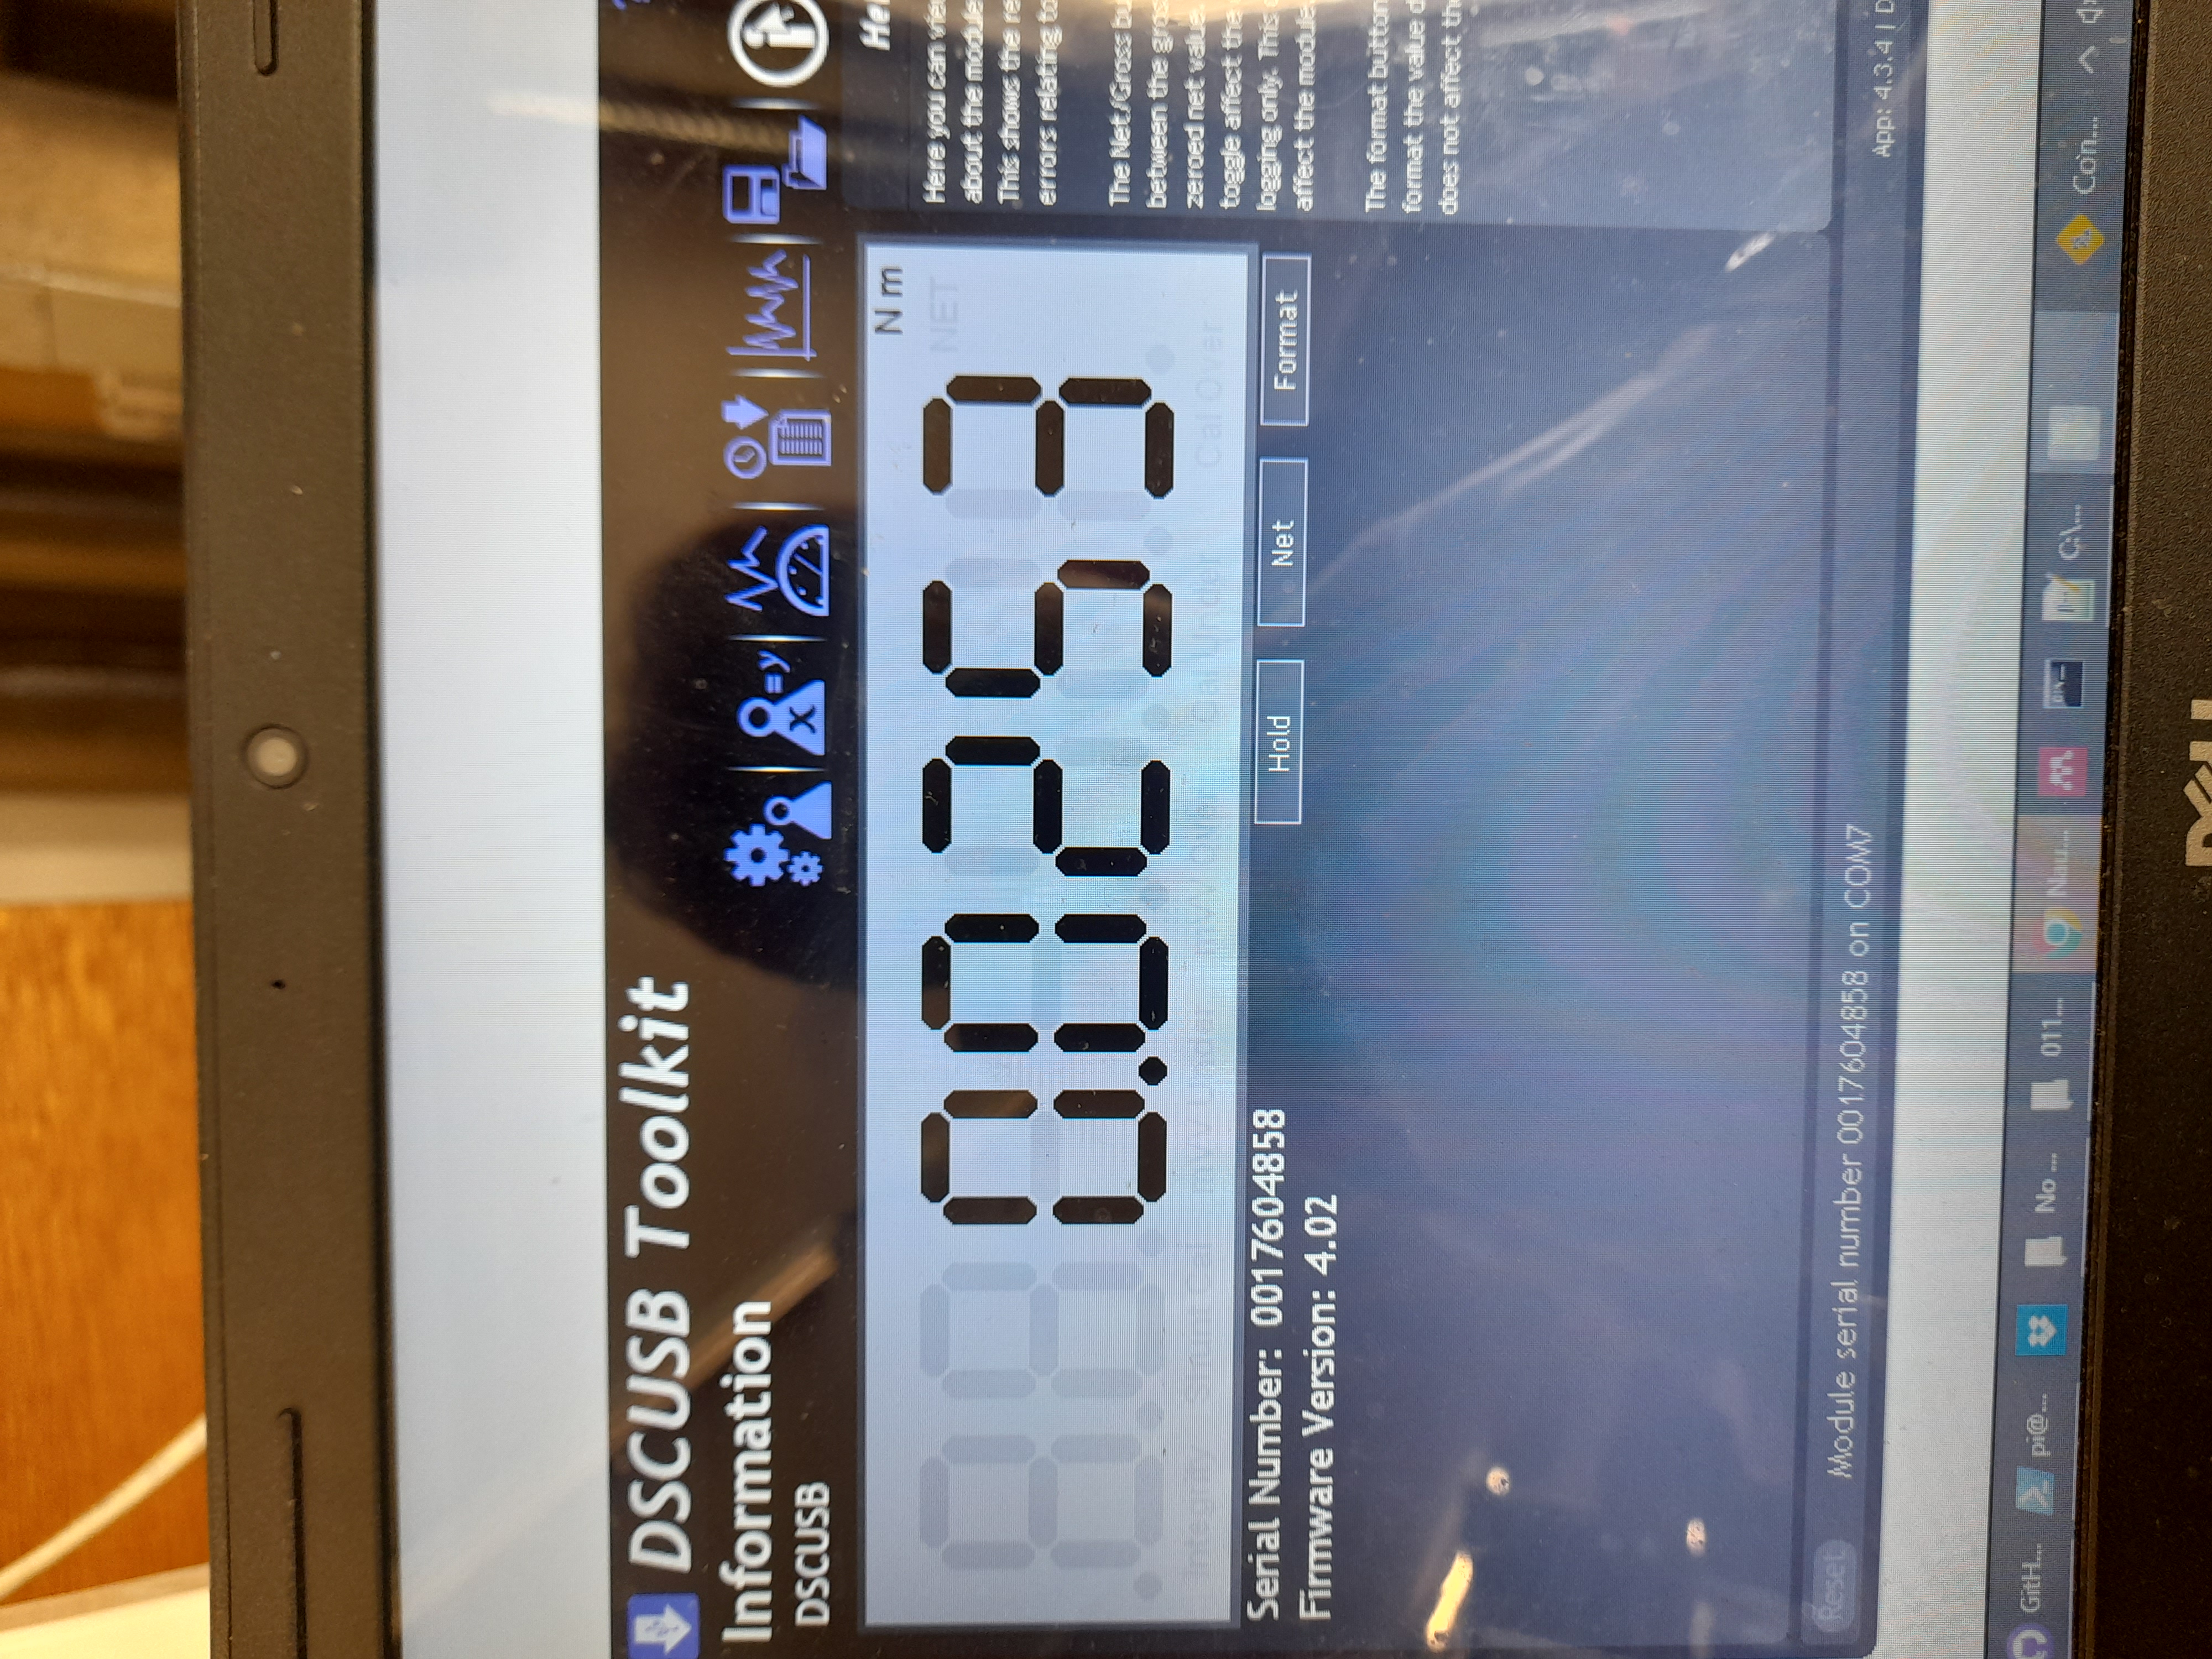
In 'Information' tab select 'Net' so that there is zero torque recorded at rest
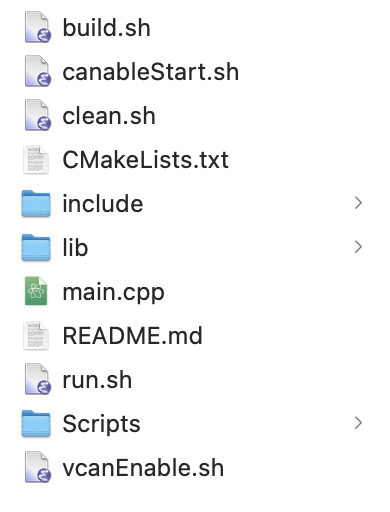
- Locate the script that you want to run (from the "Scripts" folder) and save it as a main.cpp script in the main directory on your laptop
-
Pull the changes in Raspberry Pi by typing "git pull"
-
Go the directory where main.cpp is located on your Raspberry Pi by using command "cd 'folder name'". You can check what is in the current folder on raspberry pi by typing "ls".
-
type "chmod +x build.sh"
-
type "chmod +x canableStart.sh"
-
type ./build.sh
-
The compiler should build the file
-
If running the code for the first time after turning the Raspberry Pi on, type "canableStart.sh"
-
Open DSCUSB toolkit program and choose 'Net' for the torque calculation, so that there is no torque recorded at rest
-
Start recording the loadcell data on DSCUSB toolkit
-
Now switch to terminal to operate Raspberry pi
-
In the folder where the main.cpp script is located, type ./bin/main
-
After running the script the file data.csv needs to be uploaded to git. To do this type
-
"git add 'data.csv'"
-
git commit -m "New Data"
-
git push
To stop the script at any time press 'Command + C"
Now when on your laptop if you "pull" on GitHub desktop the updated data.csv file should be available
The code contained in this repository for the following experiments: 1) Code to test stiction with spring disconnected 2) Code to test dynamic resistance with spring disconnected 3) Code to test stiction with spring connected 4) Device Law with sinusoidal carriage motion. These scripts will be covered separately.
-
Performs the stiction measurement trajectory
-
Parameters that can be modified are:

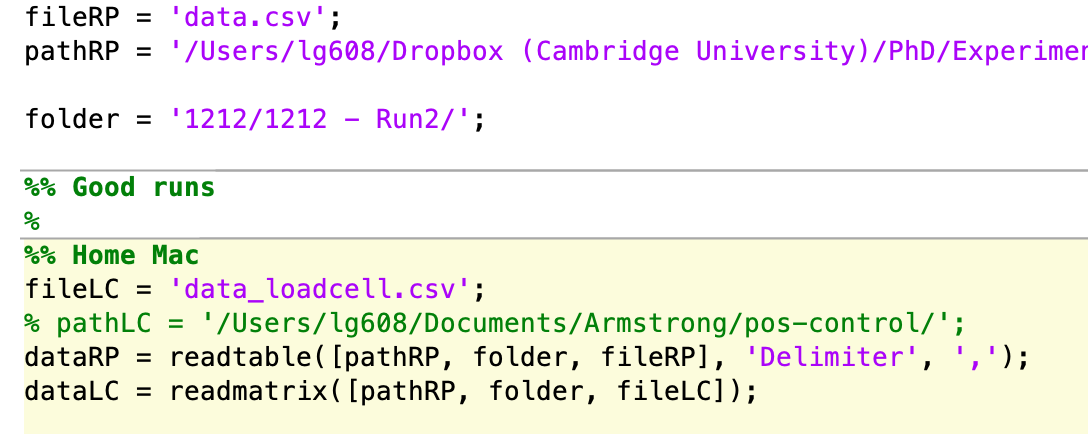
- The code is located in folder MATLAB Processing Scripts
- Copy this folder to some local directory for convenience
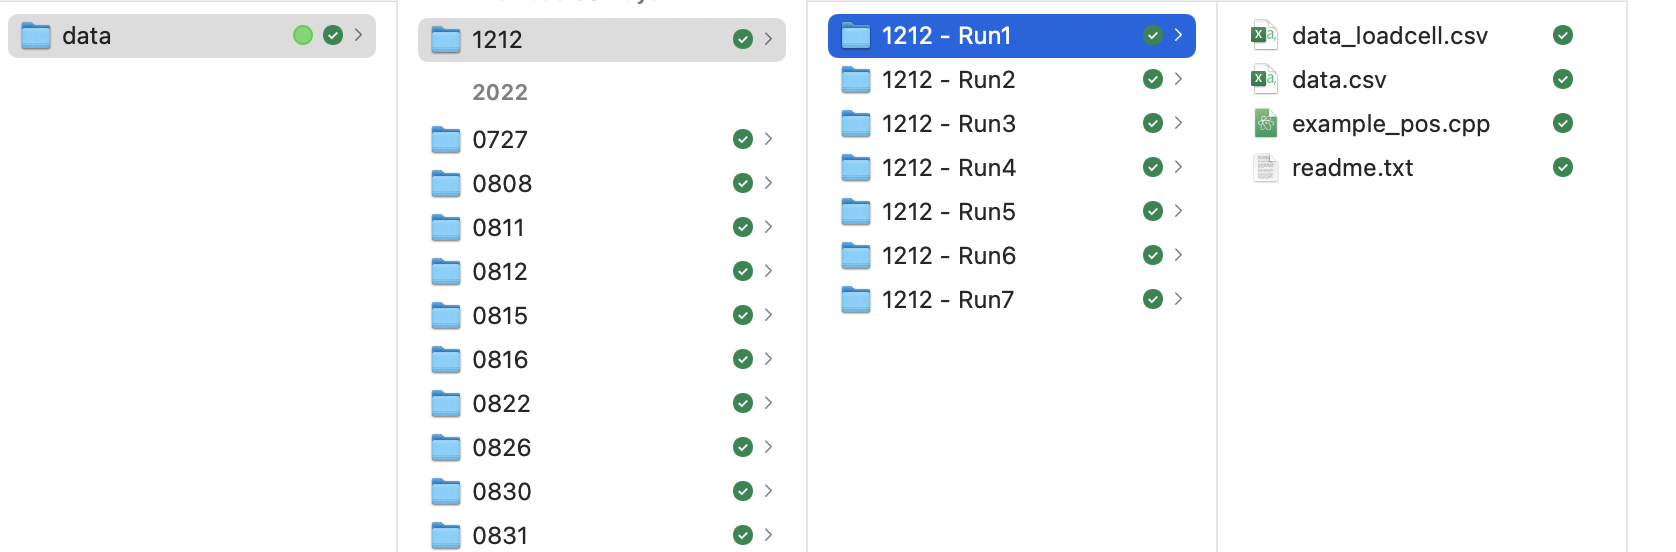
- Copy and paste 'data.csv' and 'data_loadcell.csv' files to some local directory
- When running processing code you will need to change the path in this line to the path of where the files are located
CTRE - documentation: https://v5.docs.ctr-electronics.com/en/stable/
CTRE - C++ documentation: https://api.ctr-electronics.com/phoenix/release/cpp/
Github troubleshoot - https://docs.github.com/en
Loadcell software manual - https://novatechloadcells.co.uk/products/dscusb