This is a full-stack expense tracker application built with the MERN stack (MongoDB, Express, React, Node.js). It allows users to add, view, and manage their income and expenses in a visually intuitive way.
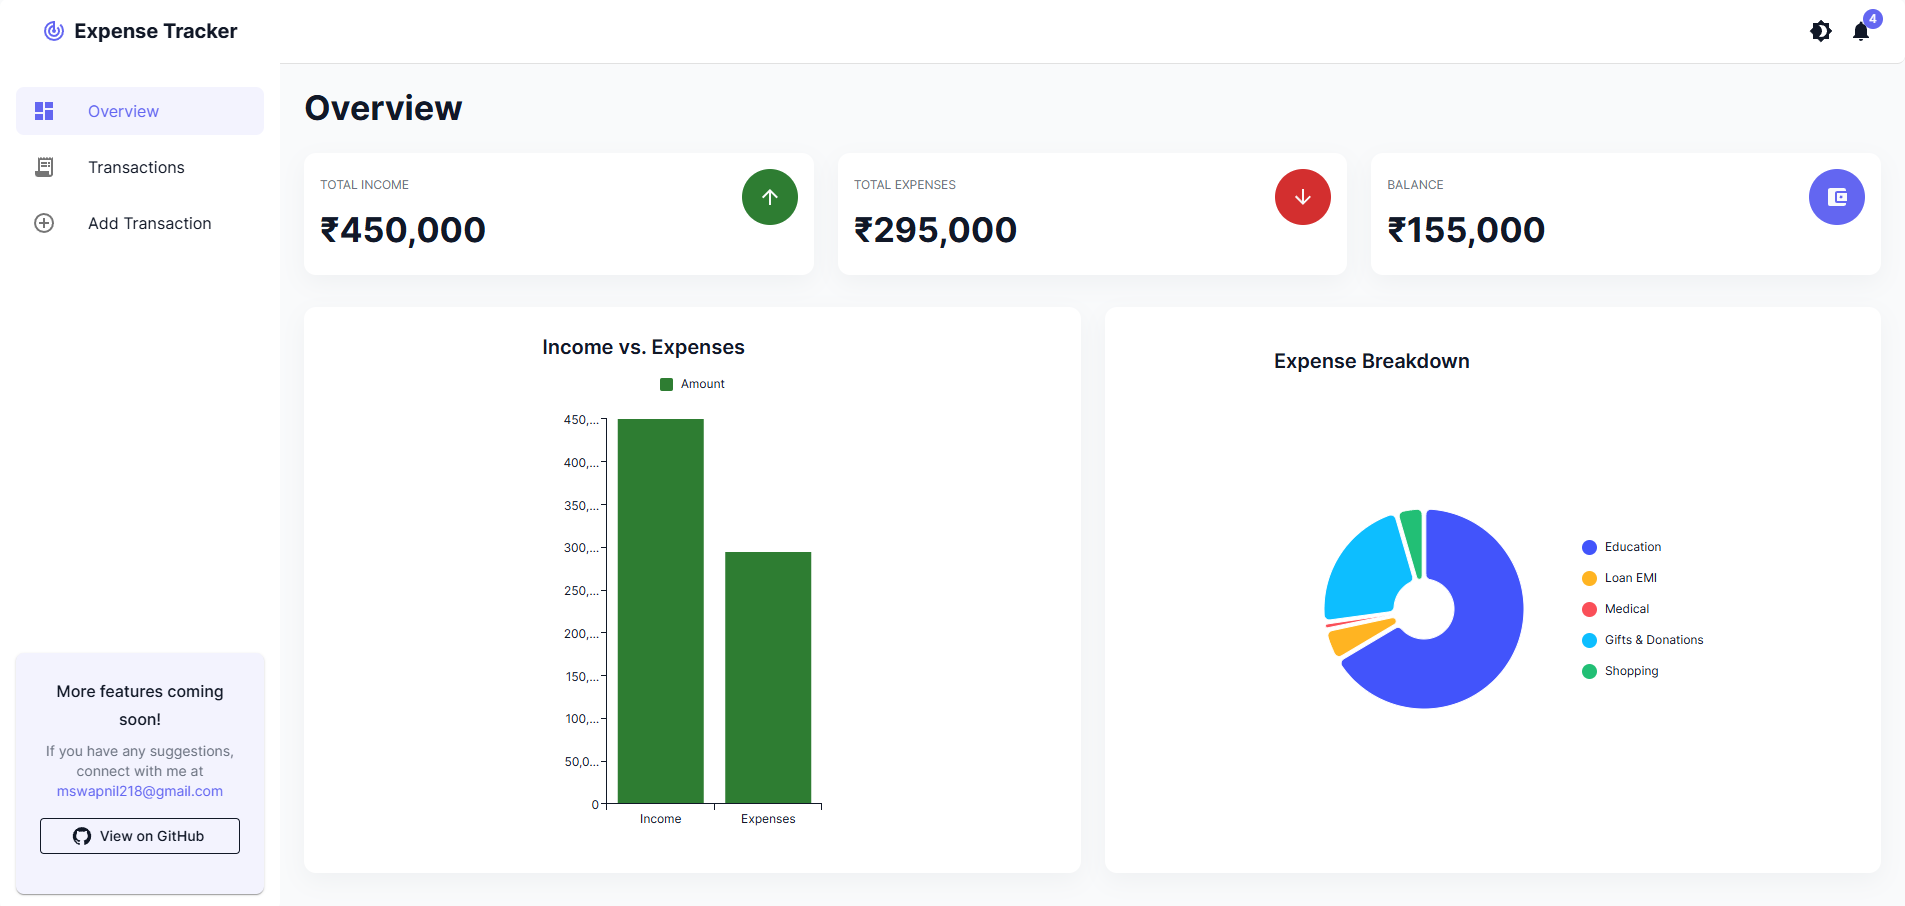
Overview
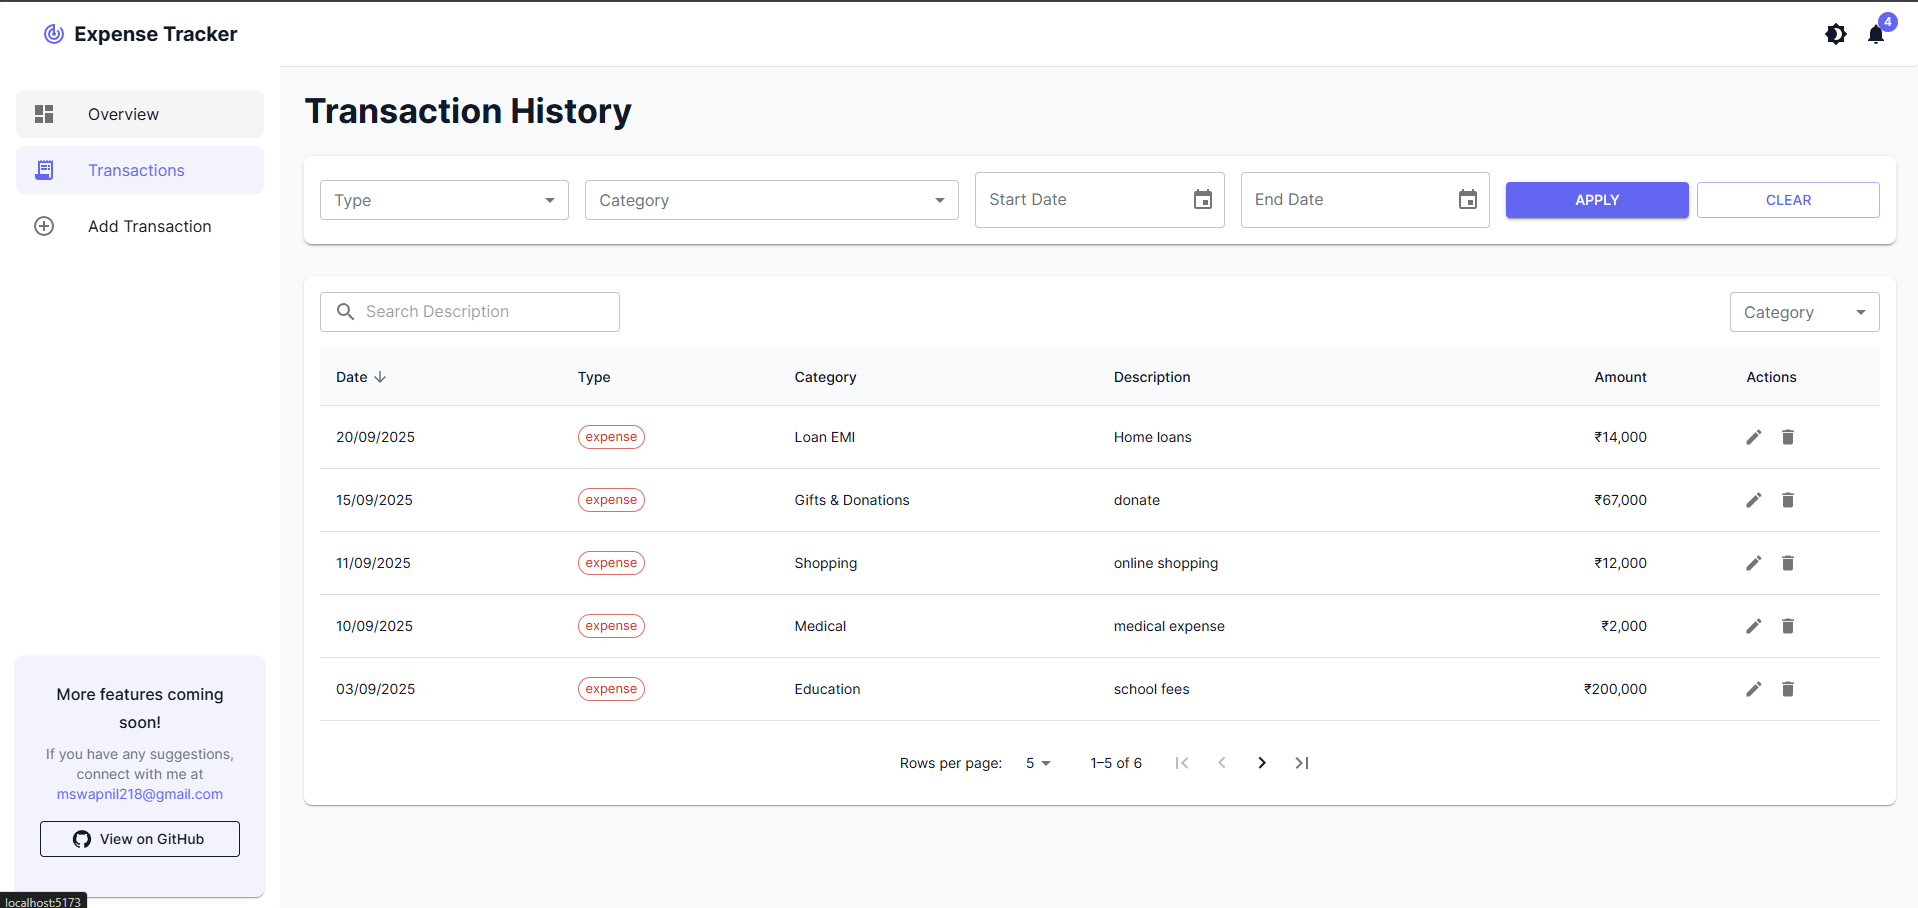
Transaction History
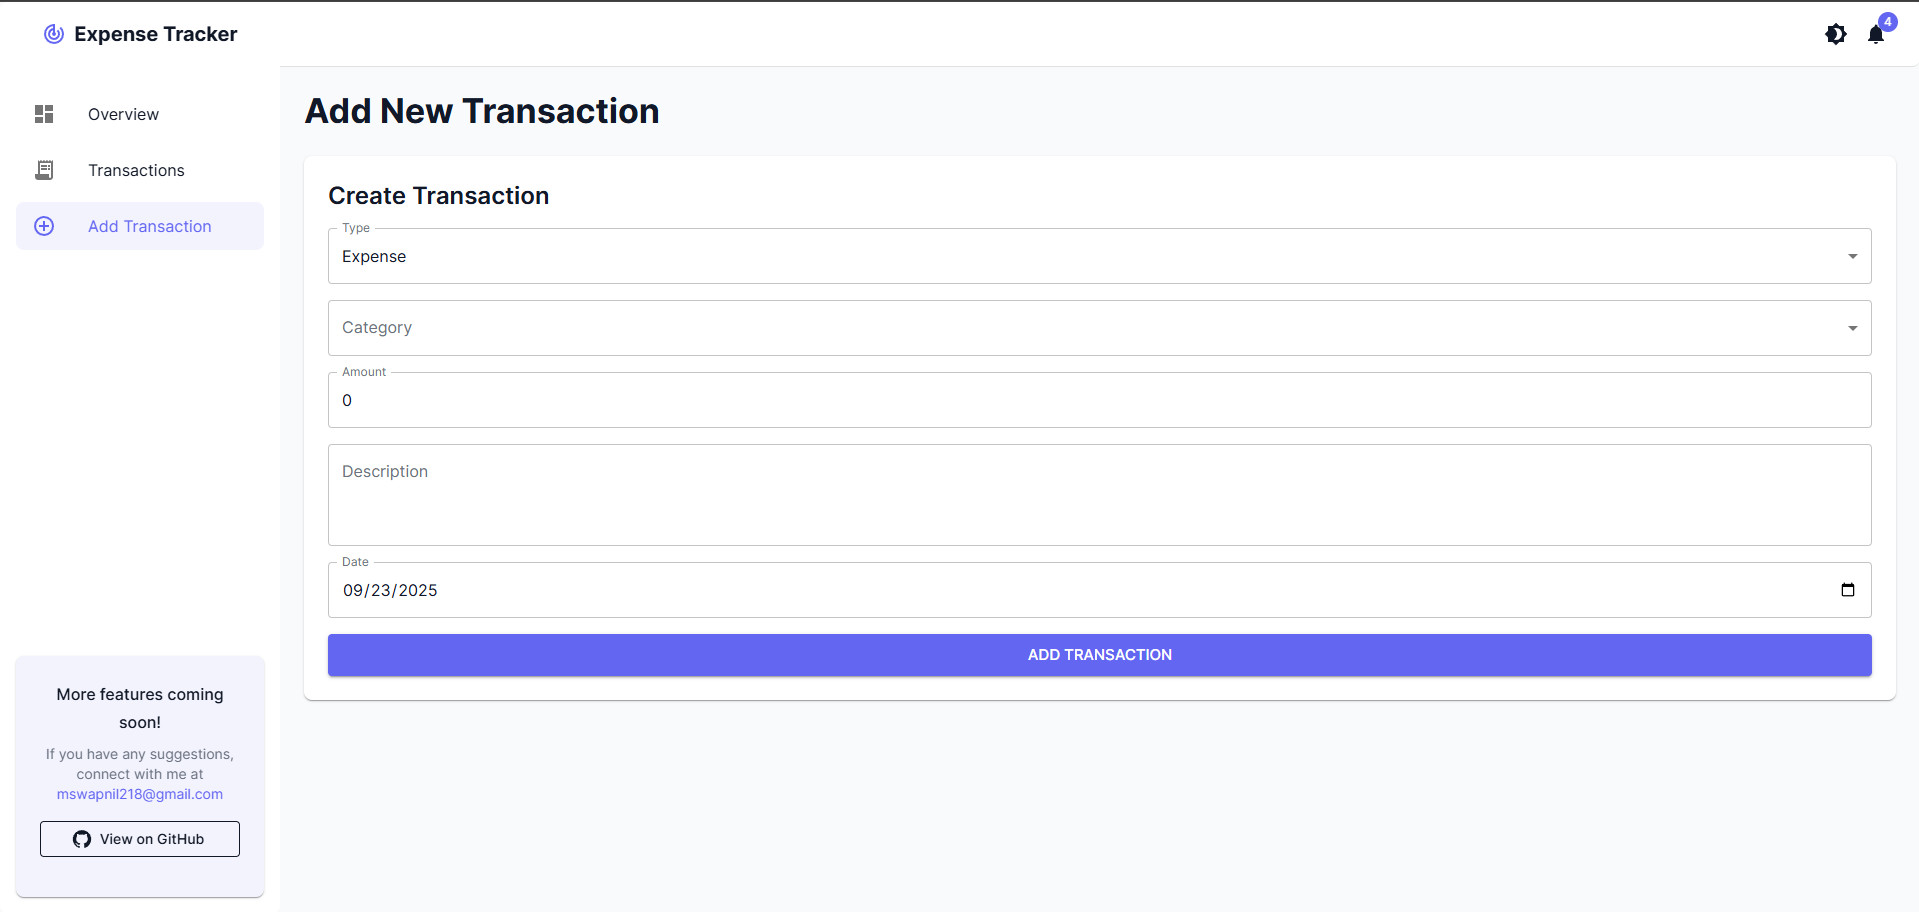
Add Transactions
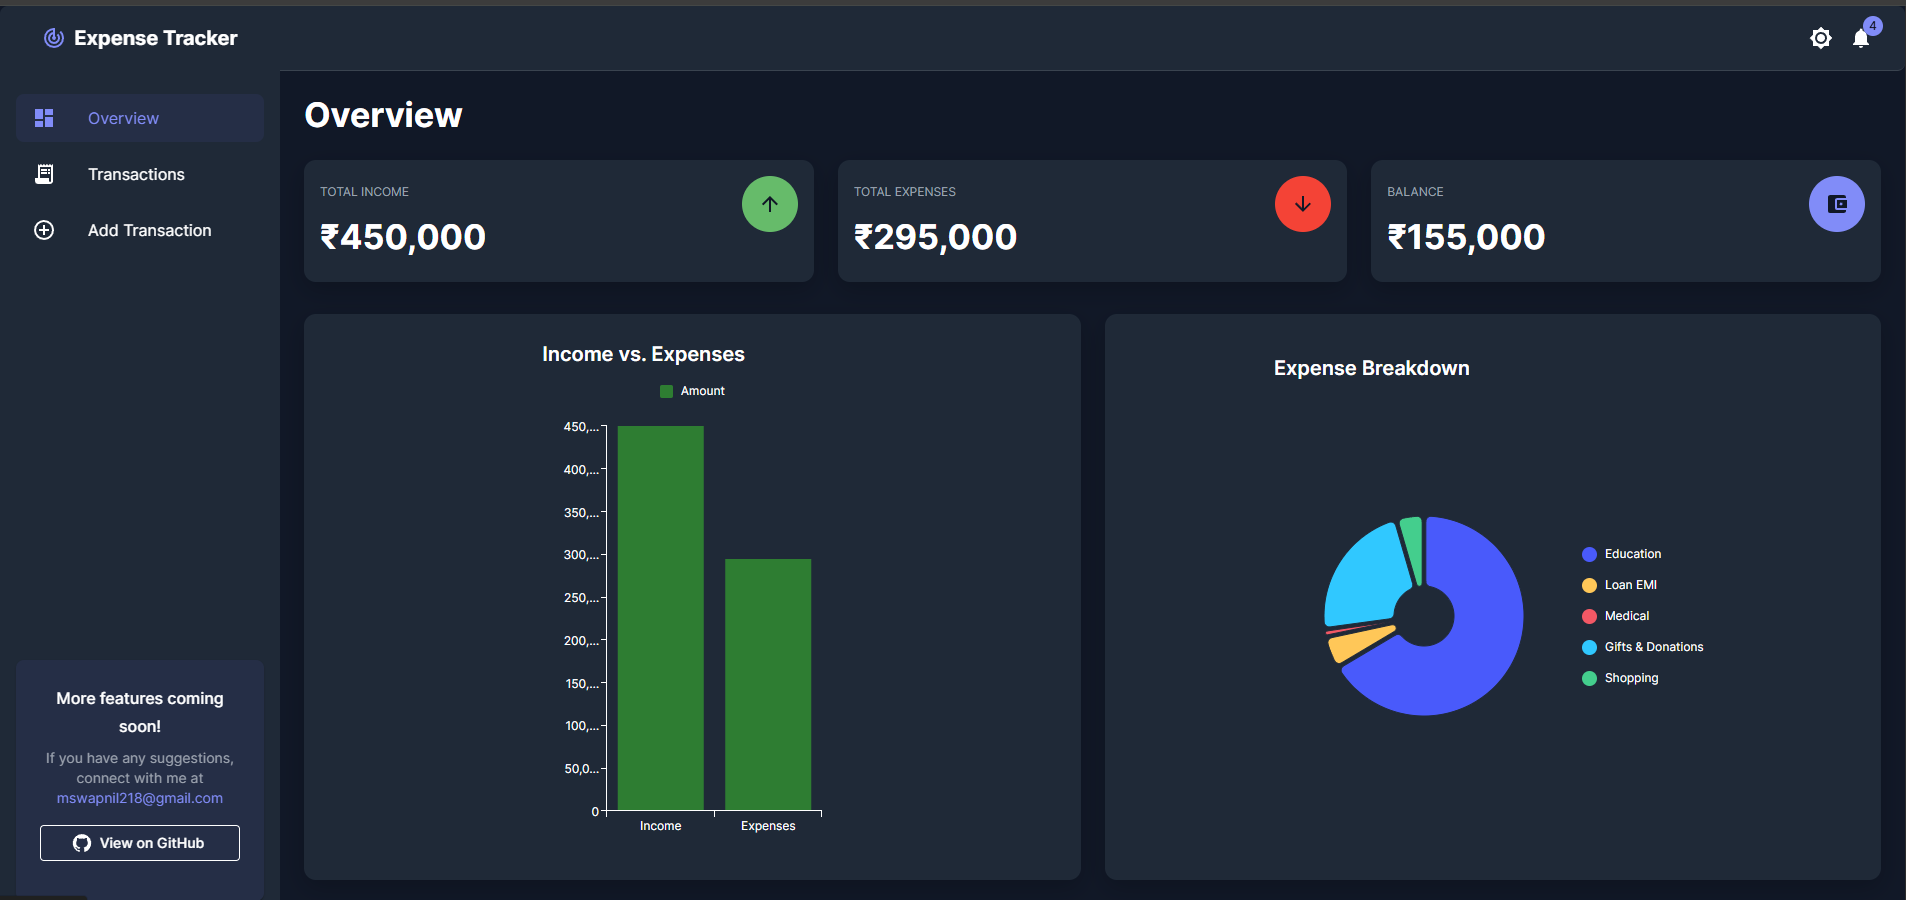
Overview (Dark Mode)
- CRUD operations: Add, view, update, and delete transactions.
- Filter transactions: Filter by type (income/expense), category, and date.
- Visual charts: Pie and bar charts to visualize income vs. expenses.
- User-friendly interface: Built with React and Material-UI (MUI).
- State management: Redux Toolkit for managing application state.
- Error handling and validation: Proper validation and error handling for all APIs and forms.
Backend:
- Framework: Node.js, Express
- Database: MongoDB
- ODM: Mongoose
- API Testing: Postman
- Other: CORS, dotenv, Winston (for logging)
Frontend:
- Framework: React, Vite
- UI Library: Material-UI (MUI)
- State Management: Redux Toolkit
- Charts: MUI X Charts
- HTTP Client: Axios
- Routing: React Router
- Node.js (v18 or higher)
- npm (v8 or higher)
- MongoDB (local or Atlas)
-
Clone the repository:
git clone https://github.com/SwapnilMk/expense-tracker.git cd expense-tracker/backend -
Install dependencies:
npm install
-
Create a
.envfile in thebackenddirectory and add the following environment variables:PORT=3000 NODE_ENV=DEV FRONTEND_URL=http://localhost:5173/ BACKEND_URL=http://localhost:3000/ MONGODB_URI=your_mongodb_connection_string
-
Run the backend server:
npm run dev
The server will start on
http://localhost:3000.
-
Navigate to the
frontenddirectory:cd ../frontend -
Install dependencies:
npm install
-
Create a
.envfile in thefrontenddirectory and add the following environment variable:VITE_API_BASE_URL=http://localhost:3000
-
Run the frontend development server:
npm run dev
The application will be available at
http://localhost:5173.
npm start: Start the production server.npm run dev: Start the development server with Nodemon.npm run lint: Lint the code using ESLint.npm run format: Format the code using Prettier.
npm run dev: Start the development server.npm run build: Build the application for production.npm run lint: Lint the code using ESLint.npm run preview: Preview the production build.
The following API endpoints are available:
| Method | Endpoint | Description |
|---|---|---|
GET |
/transactions |
Get all transactions |
POST |
/transactions |
Add a new transaction |
GET |
/transactions/filter |
Filter transactions by type, category, or date |
PUT |
/transactions/:id |
Update a transaction |
DELETE |
/transactions/:id |
Delete a transaction |