Web Application Development Overview
This document is a reference for how to set up, run, and deploy Blues reference web applications.
To get started you need to:
- Install the web app’s development dependencies.
- Configure the web app via environment variables.
- Start up a local database.
- Set up event routing.
- Launch the web app in development mode.
Visual Studio Code (VS Code) can quickly create a "Dev Container" on Windows, Mac, or Linux. To use this workflow you must install both VS Code and Docker, if you haven’t already.
Before continuing, additionally make sure Docker is running, which you can do by checking the following.
- Windows: Check for the docker (whale) icon in the system tray.
-
Linux/Mac: Run the command
docker run hello-worldfrom your terminal. If everything is working correctly you’ll see a confirmation message.
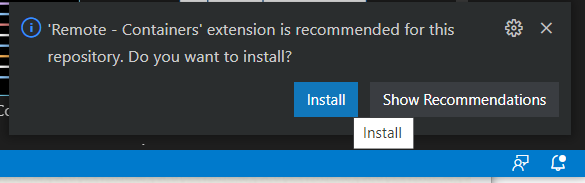
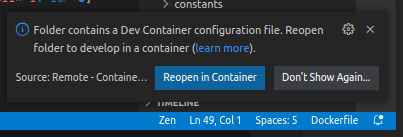
With Docker running, next open your web application in VS Code. Once you do, you will see boxes that prompt you to install the extension Remote - Containers, and then to “Reopen in Container”. Do both.
The Dev Container will automatically install Linux and the project dependencies, no matter which kind of operating system your development machine uses.
As a final step, open a terminal in VS Code, as you’ll need it to run commands throughout the rest of this guide. You can open a terminal by clicking the Terminal menu at the top of VS Code, and then selecting New Terminal.
If you choose not to use a Dev Container in VS Code, you can install the project dependencies as follows.
Blues reference web apps use Node.js as a runtime, Yarn as a package manager, and Volta as a way of enforcing consistent versions of all JavaScript-based tools. You can install these dependencies by completing the steps below.
- Install Volta by following its installation instructions.
- Run the command below in a terminal to install the appropriate versions of
both Node.js and Yarn.
volta install node yarn - Navigate to the root of the web app in your terminal or
command prompt and run
yarn install, which installs the starter’s npm dependencies.yarn install - Install the PostgreSQL database engine.
Blues reference web apps use a series of environment variables to store project-specific configuration. You must define your own values for these variables for the web app to run. You can complete the following steps to do so.
- Create a new
.envfile in the root folder of your project. - Copy the contents of your web app’s
.env.examplefile, and paste it in your new.envfile. - Change the required values in your
.envto your own values using the steps below.
Blues reference web apps need access to your Notehub project in order to access the Notehub API. An access token is used to authenticate the app.
To find retrieve an authentication token, execute the following command in your
terminal, replacing YOUR_NOTEHUB_EMAIL & NOTEHUB_PASSWORD with your own values.
curl -X POST -L 'https://api.notefile.net/auth/login' \
    -d '{"username":"YOUR_NOTEHUB_EMAIL", "password": "NOTEHUB_PASSWORD"}'
When successful, you will see a response like
{"session_token":"BYj0bhMJwd3JucXE18f14Y3zMjQIoRfD"}
Copy the value after the colon to set the appropriate environment variable in .env, e.g.
HUB_AUTH_TOKEN=BYj0bhMJwd3JucXE18f14Y3zMjQIoRfD
This is the unique identifier for your project in Notehub, and has the prefix app:.
You can find this by going to your Notehub project, clicking the Settings menu,
and finding the Project Information heading which contains Project UID. Click
the copy icon to copy this to the clipboard.
HUB_PROJECTUID=app:245dc5d9-f910-433d-a8ca-c66b35475689
If your application uses a database, you’ll have a number of these values you can configure. The default for these variables are fine for development purposes. In a production environment you'll set them to point to your production database.
Blues reference web apps receive data from Notehub through a Route created on Notehub.io that points to the web app itself. To set up your own route you’ll need to complete the following two steps.
-
Create a tunnel to a server running the reference app.
- Running the tunnel allows your local copy of the reference app to be accessible on the public internet. This is necessary for Notehub to route events to your local setup.
-
Set up a Notehub route to your tunnel.
- When Notehub receives an event it can optionally route that event to other servers. In this step, you’ll have Notehub route events to your local setup via the tunnel you created in step #1.
Blues reference web apps contain logic to process incoming Notehub events. But in order for Notehub to forward data to your local app for processing, your local app must be accessible from the public internet.
To make your local environment accessible you must set up a tunnel to your reference web application. You’re welcome to use any tunneling setup you’re comfortable using, but we recommend localtunnel or ngrok.
localtunnel is a simple free tunnel that you can run as follows. Replace acme
with the name of your choice.
$ npx localtunnel --port 4000 --subdomain acme
Need to install the following packages:
  localtunnel
Ok to proceed? (y) y
your url is: https://acme.loca.lt
You can close the tunnel with ctrl+c.
Ngrok is a freemium alternative to localtunnel, which requires an e-mail signup, a modicum of setup, and in free-mode does not give you a tunnel with a consistent domain name. The inconsistent domain name will require you to update your route each time you start your tunnel. To use ngrok you’ll first need to:
- Sign up for ngrok. (It’s free to start.)
-
Install ngrok. (
brew install ngrok/ngrok/ngrokworks well for macOS users—and yes,ngrok/ngrok/ngrokis the package name recommended by Ngrok itself.) - Set up your ngrok auth token.
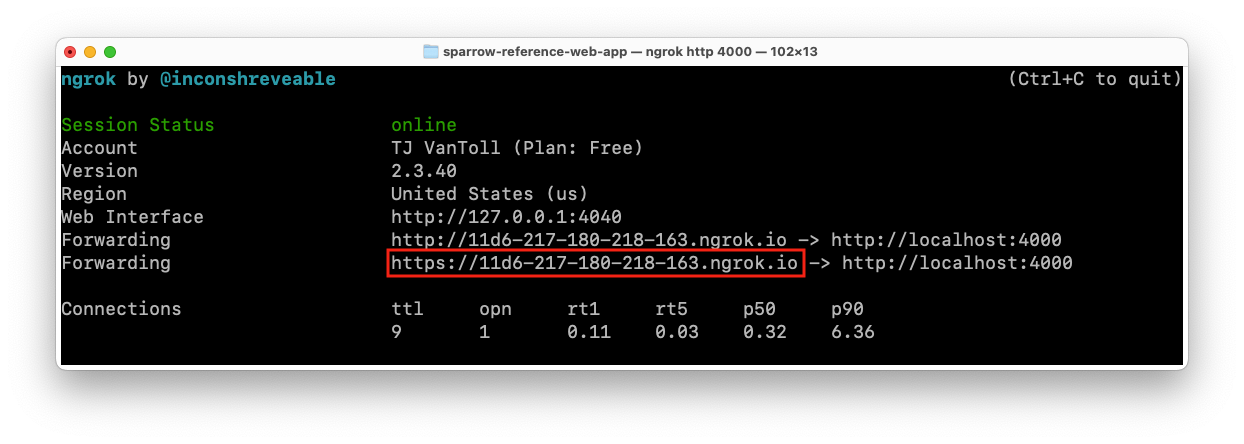
Next, open a new terminal and run ngrok http 4000, which creates the tunnel itself.
ngrok http 4000
If all went well, you should see a screen in your terminal that looks like the image below. ngrok is now forwarding all requests to https://<your-id>.ngrok.io to http://localhost:4000. Copy the forwarding address (shown in the red box below) to your clipboard, as you’ll need it in the next step.
NOTE: Your
ngrokterminal needs to stay running for the tunnel to remain active. If you close and restartngrokyour URL will change.
To verify everything worked correctly, you can try loading the URL you just copied in a web browser; you should see your reference web app’s home page.
With a tunnel in place, your next step is to create a route in Notehub that forwards events to your local app.
To set up the route complete the following steps:
- Visit Notehub and open the project you’re using for your web app.
- Select Routes in the navigation on the left-hand side of the screen.
- Click the Create Route link in the top right of the screen.
- Find the General HTTP/HTTPS Request/Response route type, and click its Select button.
- Give your route a name.
- For the route URL, paste the localtunnel or ngrok URL you copied earlier, and append
/api/datastore/ingest. For example your route should look something likehttps://bb18-217-180-218-163.ngrok.io/api/datastore/ingest. - Scroll down, and click the blue Create new Route button at the bottom right of the page.
And with that your route is now complete. When Notehub receives an event it should automatically route that event to your tunnel, and ultimately to your local app.
NOTE Event routing only happens when Notehub receives an event, therefore your hardware needs to generate new data and send it to Notehub for Notehub to invoke your route.
Now that you have both a tunnel and route in place, your last step is to create the database itself.
Some Blues reference web app uses a PostgreSQL database to store data, including the data the app receives from Notehub events. If your app requires a database, complete the following steps to set up your own PostreSQL instance.
There are many different ways you might want to create a Postgres database. If you’re unsure how to start, we recommend running Postgres through Docker as follows.
Open a terminal (Terminal > New Terminal) and run one of the following commands.
# Choose one:
./dev.db.ephemeral.sh # Start a database which will delete its data when stopped
./dev.db.persistent.sh # Start a database with data that persists after stopping and starting again.
On Windows you may need to Allow access when the Windows Defender Firewall
asks you to allow com.docker.backend.exe.
$ ./dev.db.persistent.sh
... elided ...
Done in 2.65s.
Database is now running the background. Use ./dev.db.stop.sh to stop it.
This creates a PostgreSQL database running in Docker. You can ensure the database is
running as expected with the ./dev.db.status.sh command.
$ ./dev.db.status.sh
398940737bae   postgres  "docker-entrypoint.s…"   2 hours ago   Up 2 hours   0.0.0.0:5432->5432/tcp, :::5432->5432/tcp   sparrow-postgresql-container
To stop the database you can use ./dev.db.stop.sh.
./dev.db.stop.sh # Stop the database (and delete the ephemeral data if any)And you can delete the database’s data with ./dev.db.delete.sh.
./dev.db.status.sh # Show whether the database is running
./dev.db.delete.sh # to remove the persistent database data
If you'd like to connect to your locally running Postgres instance to ensure new Notehub events are being added, you can use the Prisma Studio database management tool to easily explore.
./dev.db.manage.sh # Open a webpage at http://localhost:5555 that lets you explore the databaseThis will open up a new browser window at http://localhost:5555 where you can see your Prisma DB, its tables, and any data that currently resides therein.
And just like any other database GUI, you can click into models to view data, manipulate data, filter, query, etc.
If you manually created your PostgreSQL database instead of using one of the
scripts above to automatically create one in Docker, you will want to configure
the DATABASE_* environment variables in your .env file, and then use the
./prod.db.init.sh script to initialize the database.
$ ./prod.db.init.sh
This script will clear your database and reinitialize it.
Continue (y/n)?y
yes
Done in 10.36s.
Database has been reinitialized.
There are a number of gotchas that could prevent your Notehub data from making it to Postgres and your web app. If you’re having issues try the following things:
- Is Docker running the local Postgres instance on your machine?
- Currently there's no error message thrown if the Postgres Docker container's not running.
- Does your Ngrok endpoint match what's in Notehub and have the suffix
/api/datastore/ingest?- Be aware, every time the Ngrok connection is shut down and restarted, it will be started up with a brand new URL, so you'll need to update the route accordingly in Notehub to ensure data keeps flowing to it
- Have you added the correct Postgres URL and Notehub project API environment variables to
your
.envfile?
With all dependencies now set up, you’re ready to run the web app. All Blues reference
web apps use the Next.js web
framework to serve React-powered web pages and HTTP JSON APIs. You can start a
Next.js development server using yarn dev.
yarn dev
With the development server running, open http://localhost:4000 in your web browser to see your application.
Next.js automatically watches your project’s files, and updates your application
as you make changes. To try it, open your app’s src/pages/index.tsx file, make
a change, save the file, and notice how your browser automatically updates with
the change.
NOTE: Changes to
.envare not automatically reloaded, and require you to stop theyarn devwithctrl+cand to startyarn devback up.
The project’s src/pages/api directory are
APIs as opposed to
React-powered HTML pages.
The reference web apps use these routes in several places to access the
Notehub API
server without triggering a full-page reload.
NOTE: If you’re new to Next.js, the Next.js official interactive tutorial is a great way to learn the basics, and understand how the reference web apps work.